• Skip to primary navigation
  • Skip to main content
  • Skip to primary sidebar
  • Skip to footer

Southern Made Simple

Keeping things simple with a smidge of Southern charm

  • Home
  • About Me
    • Policies
    • Work With Me / Media Kit
  • Home Cookin’
    • Appetizers
    • Breakfast
    • Main Course Meals
    • Desserts
    • Recipe Index
  • My Favorite Things
    • DIY Projects
    • Farmhouse Finds
    • Product Reviews
    • VBS Resources
  • For the Kids
    • Cloth Diapering
    • Kids Fashion
    • Parenting and Lifestyle
  • Etsy Shop
  • Contact

Home Cookin'

Cranberry Banana Nut Bread

November 28, 2020 by Laura Tucker Leave a Comment

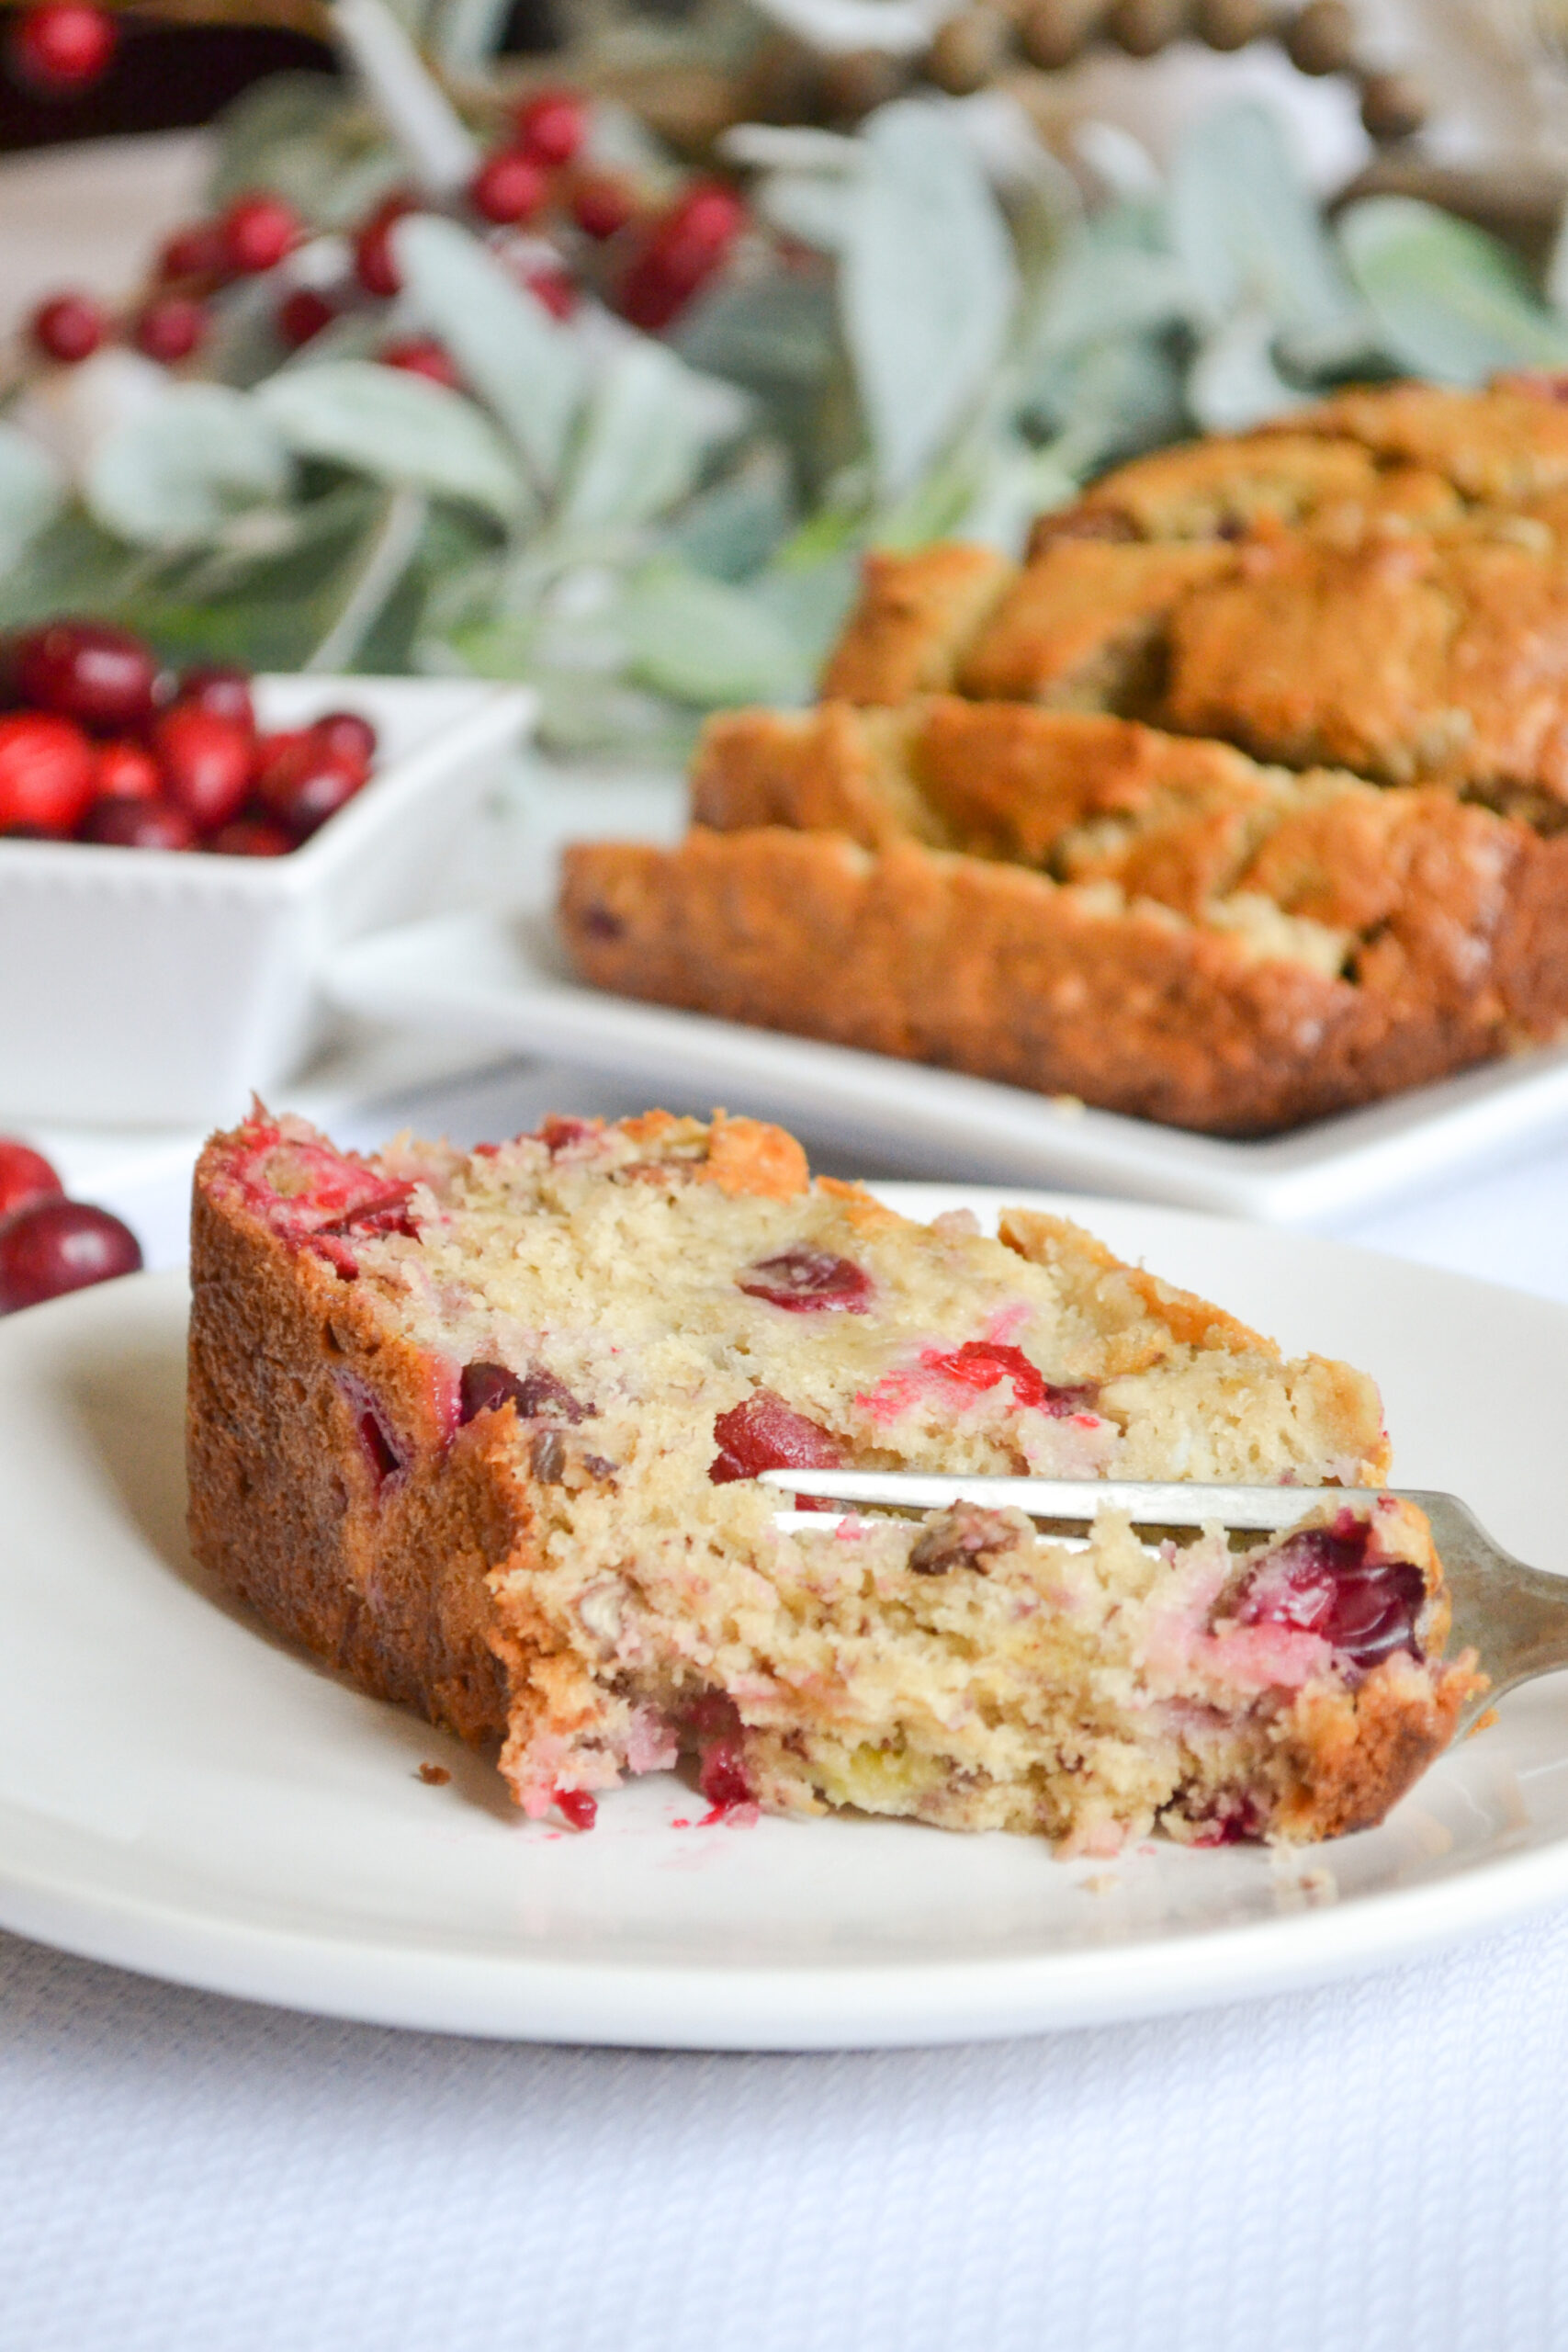
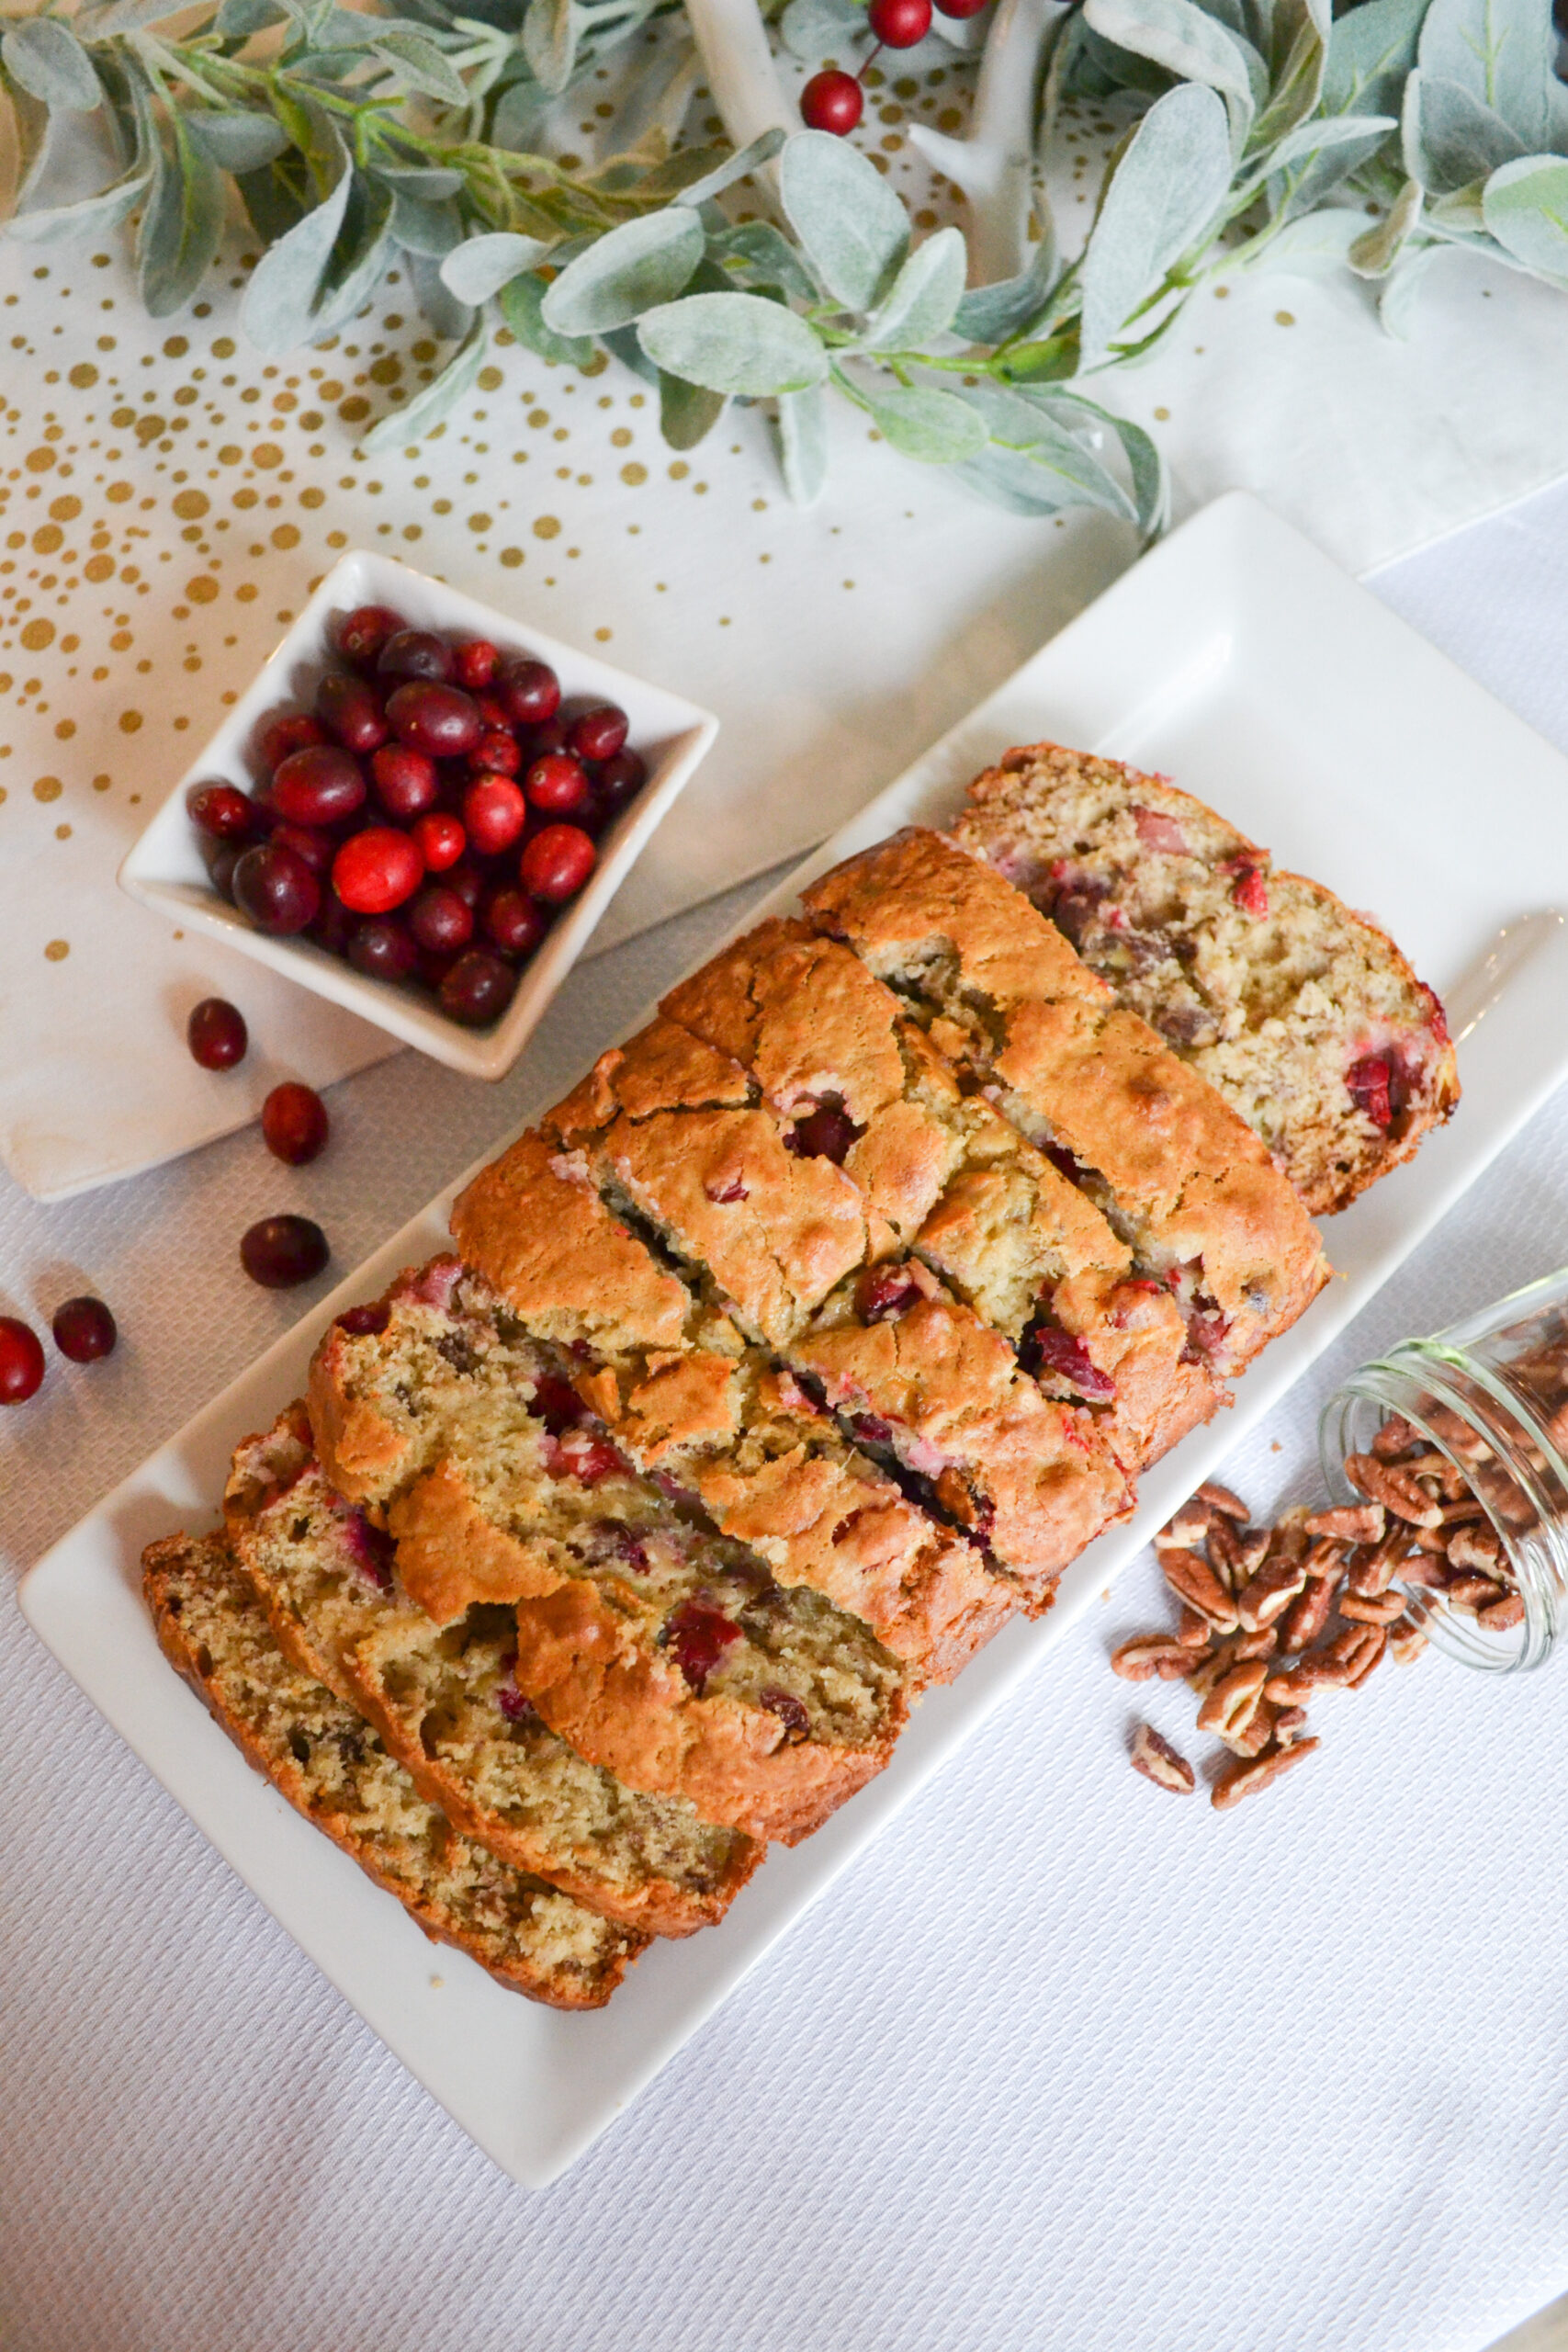
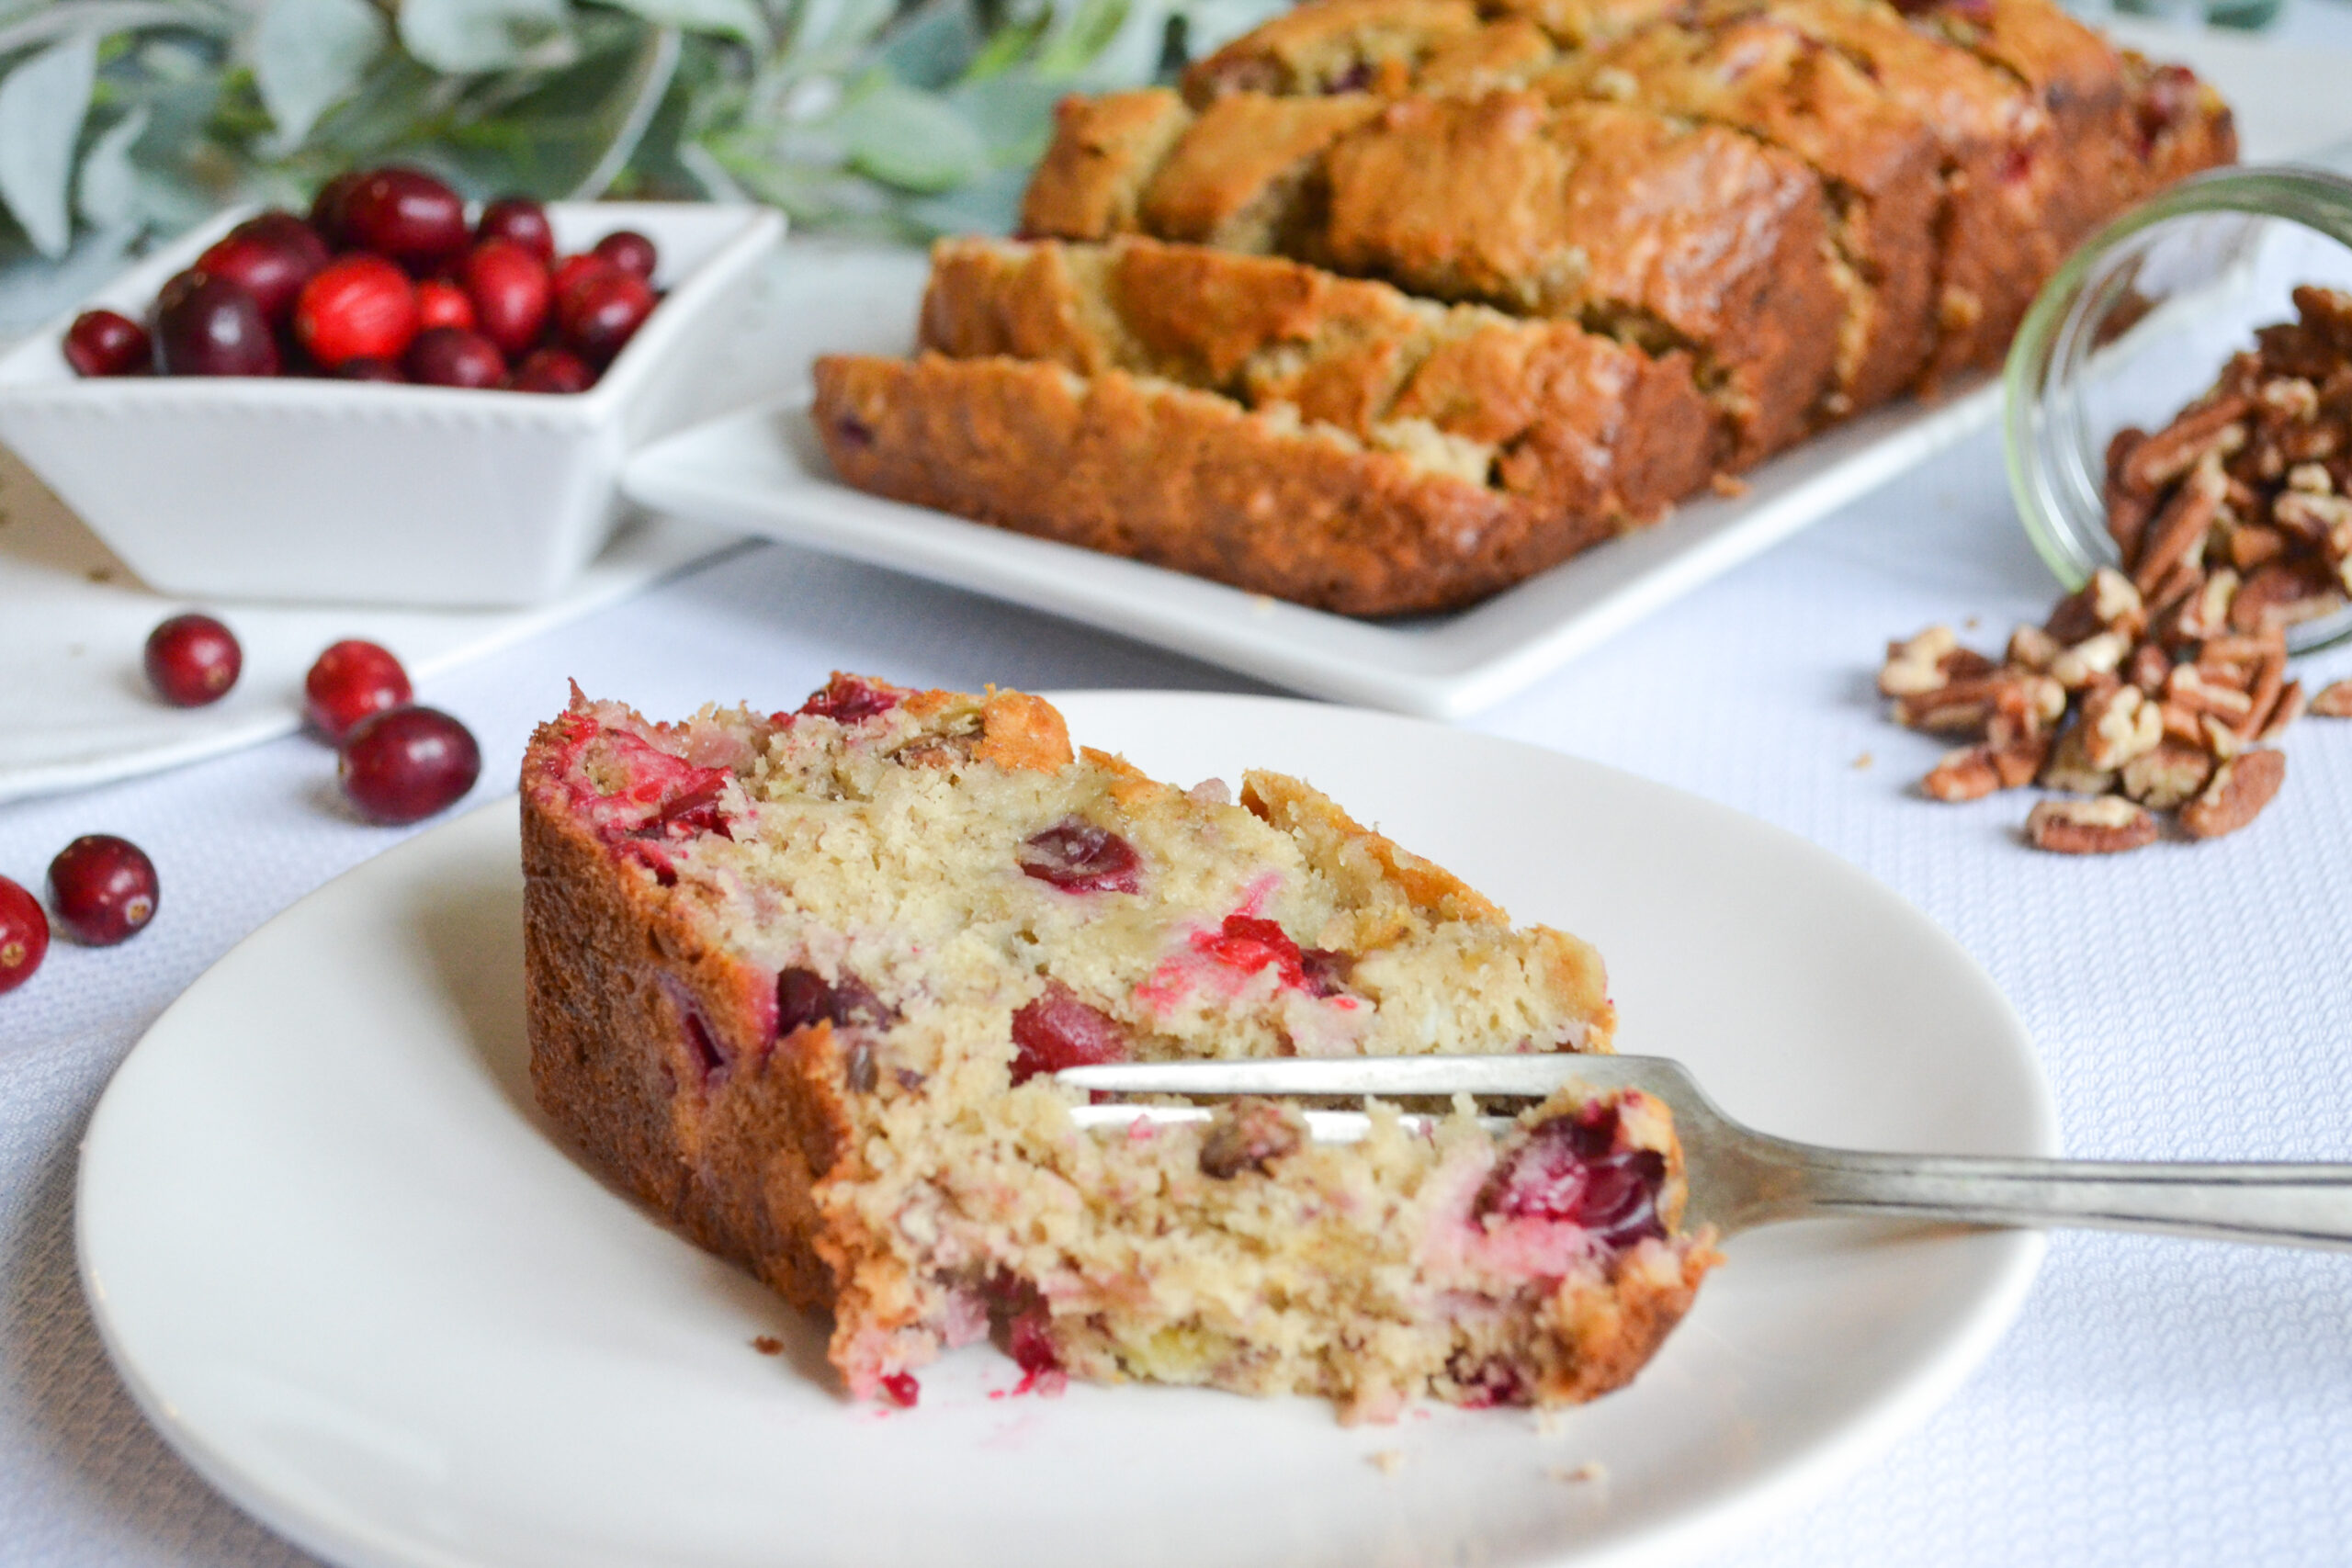
This recipe for Cranberry Banana Nut Bread is one of my favorite things to bake during the holiday season. When it’s sweet aroma fills my kitchen as it’s baking, it has a special way of giving me those warm and fuzzy feelings that only the Christmas season can bring. The tartness of the cranberries paired with the sweetness of the bananas makes a wonderful combination, and it’s absolutely delightful with a pad of butter smeared on top and a cup of coffee to go with it!

Cranberry Banana Nut Bread

Little known fact about me: I do not like bananas. At all. You won’t ever find a banana pudding recipe or a banana cream pie here on Southern Made Simple. Even their smell bothers me. I have to turn my head away when I’m peeling one for my daughters to eat. Banana flavored things such as pudding or candies are also a hard pass for me. However, oddly enough, the one exception to my strange distaste for bananas is banana nut bread. And I don’t just like banana nut bread, I love it.

Cranberry Banana Nut Bread

And when I get lucky enough to have a few bananas on the counter that my daughters are no longer interested, I know exactly what I’m going to make with them. Cranberries freeze decently, so this time of year when the grocery stores have plenty of them on hand, I like to buy extra and keep them in the freezer so that I can pull them out and bake with them throughout the first few months of the year.

Cranberry Banana Nut Bread

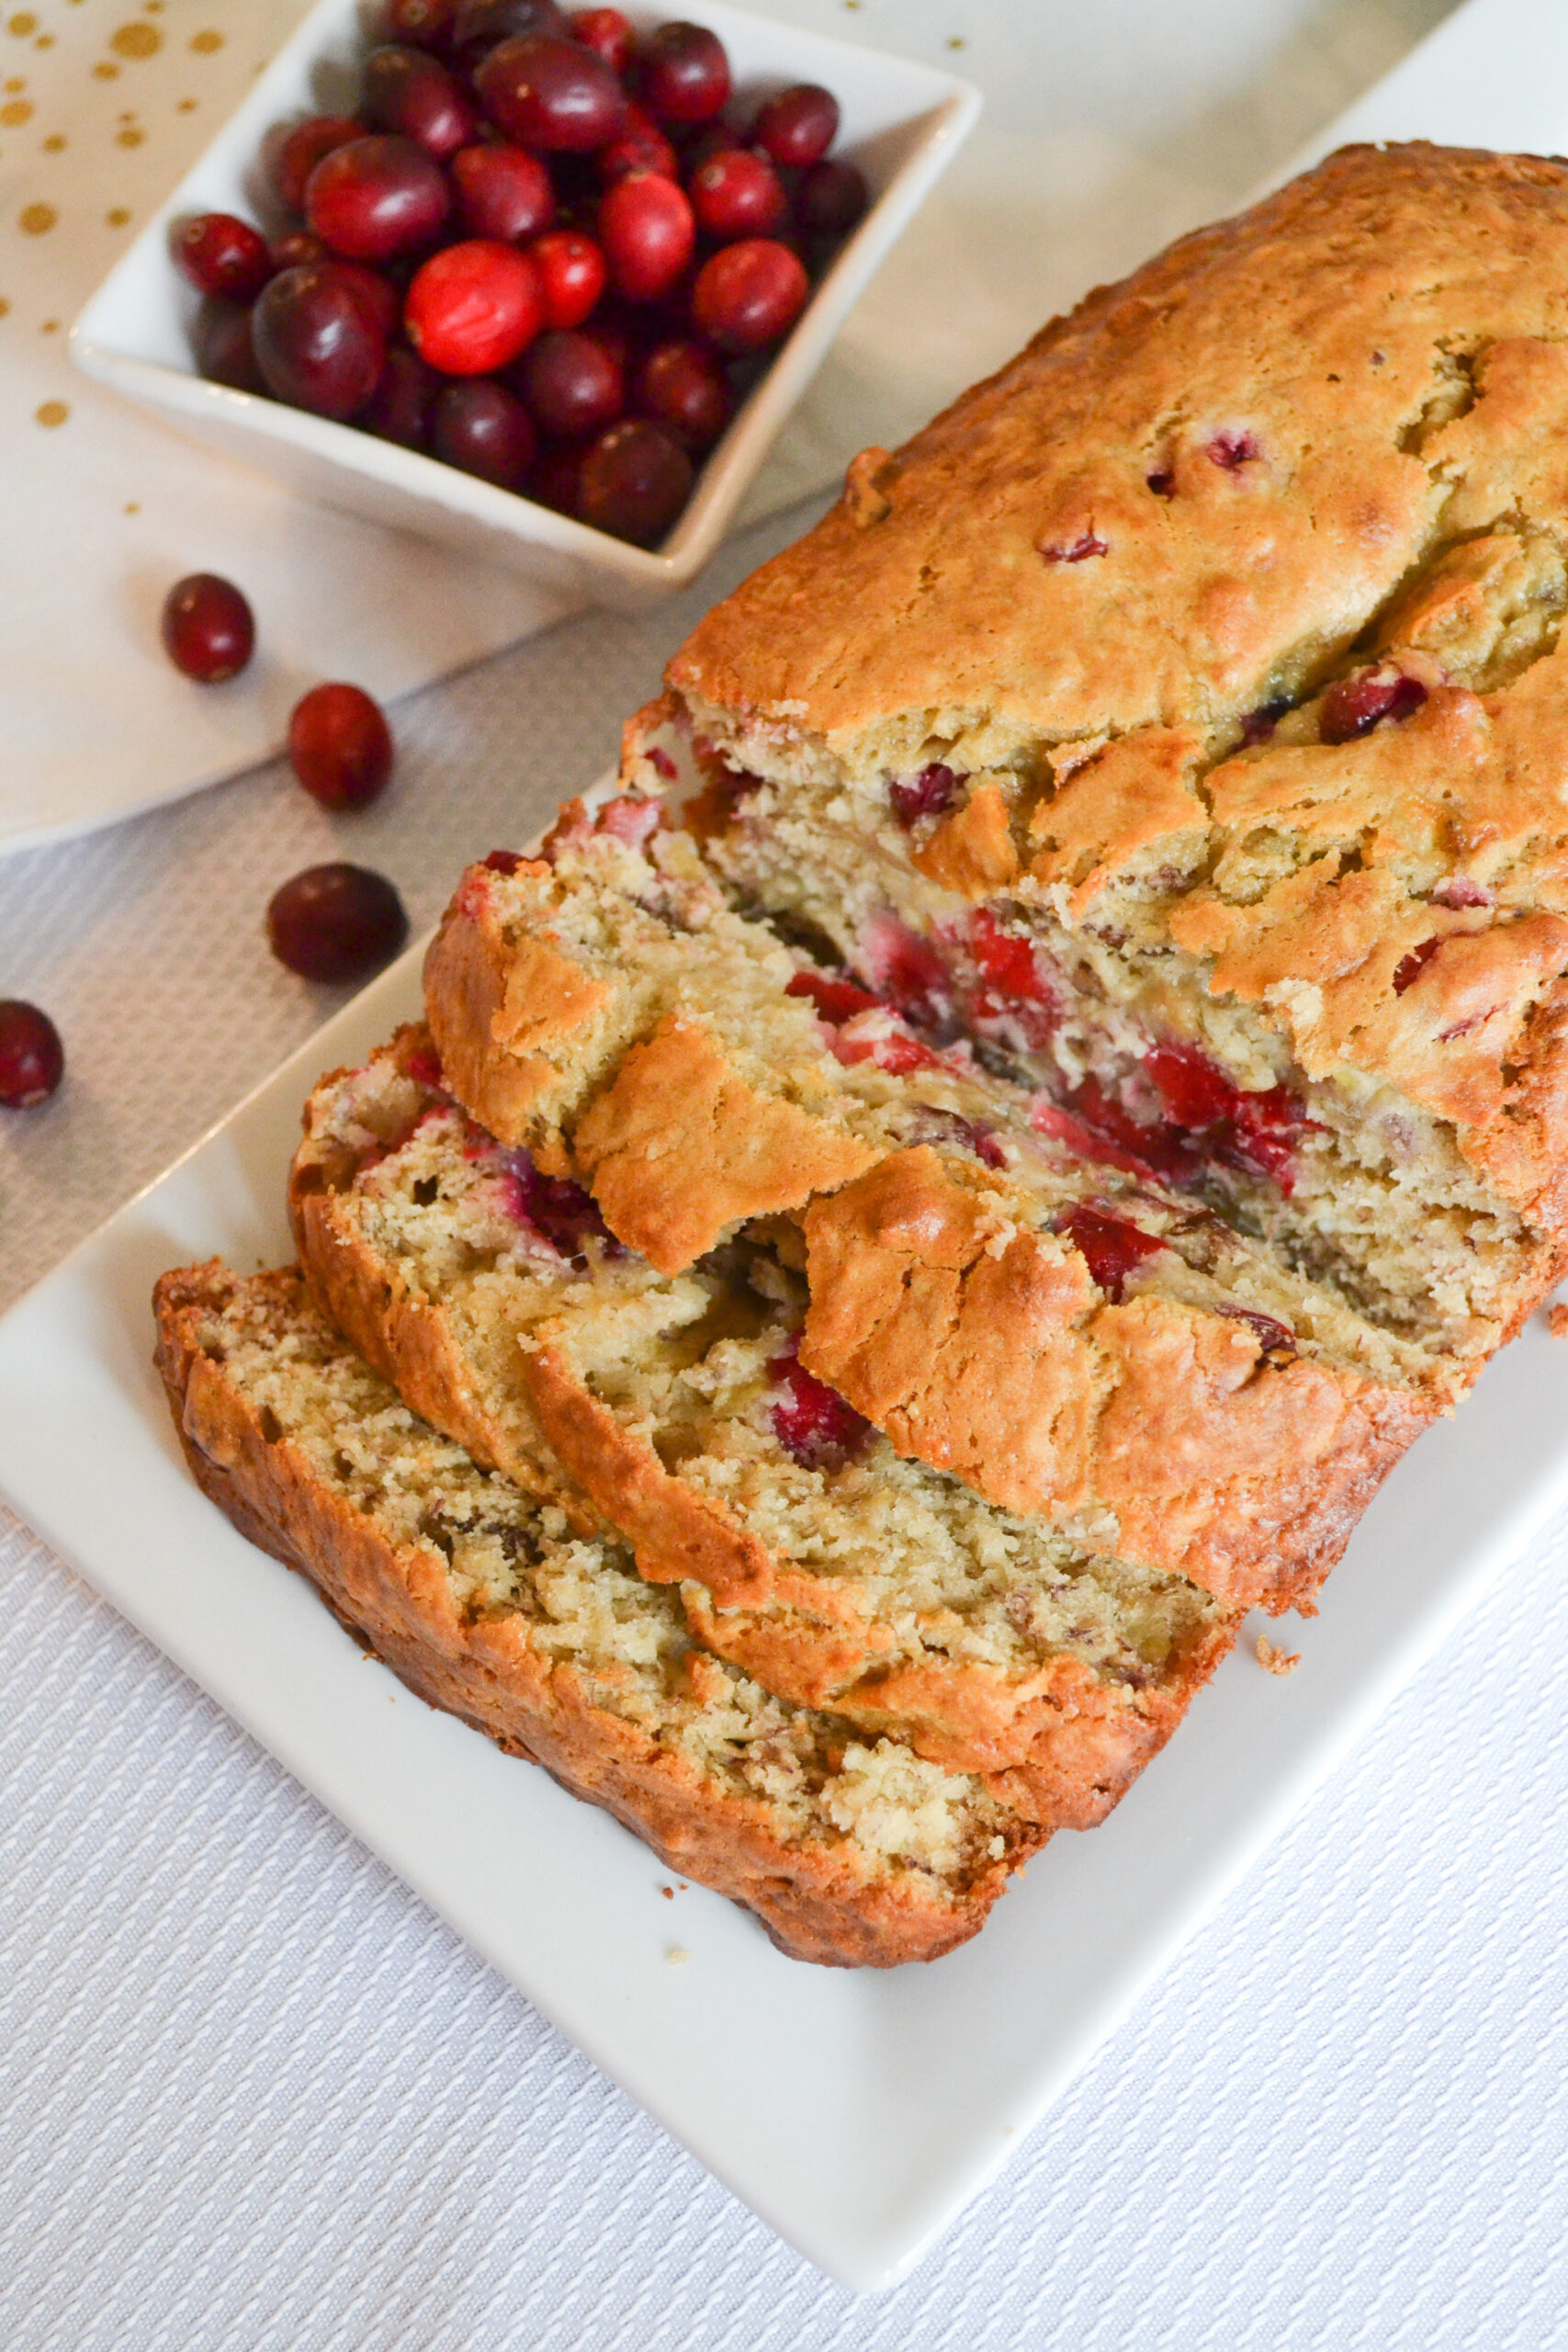
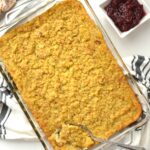
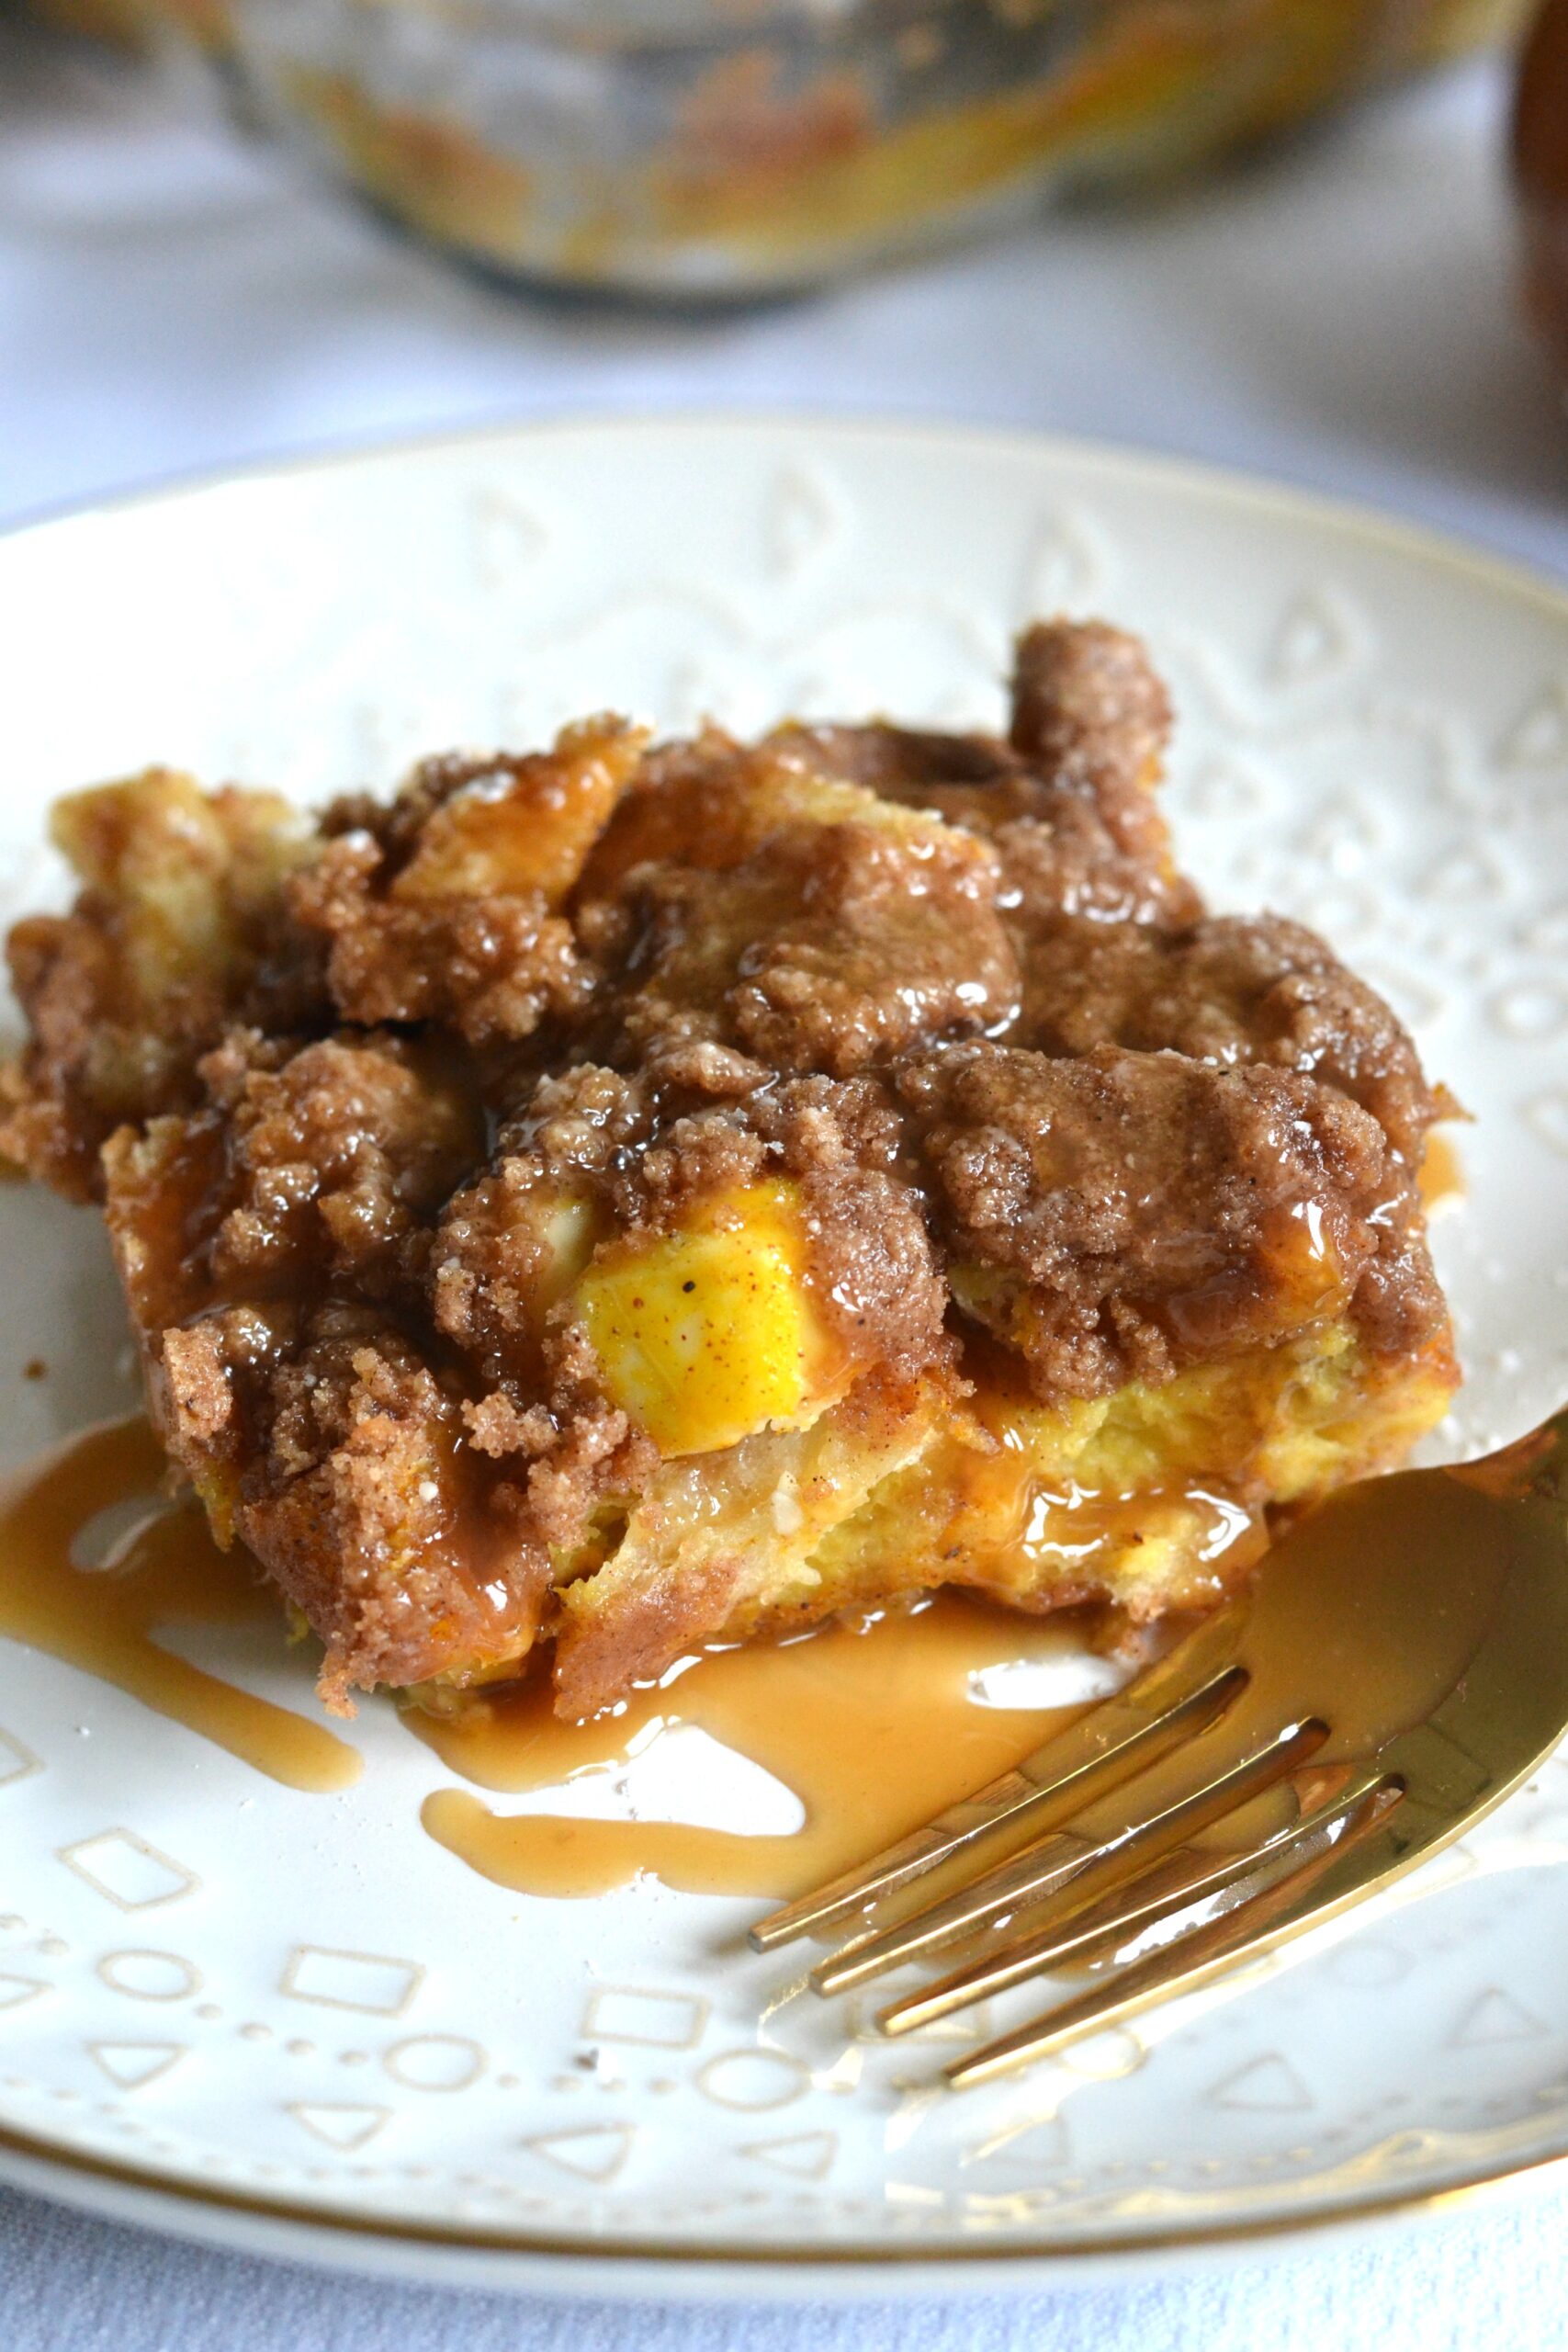
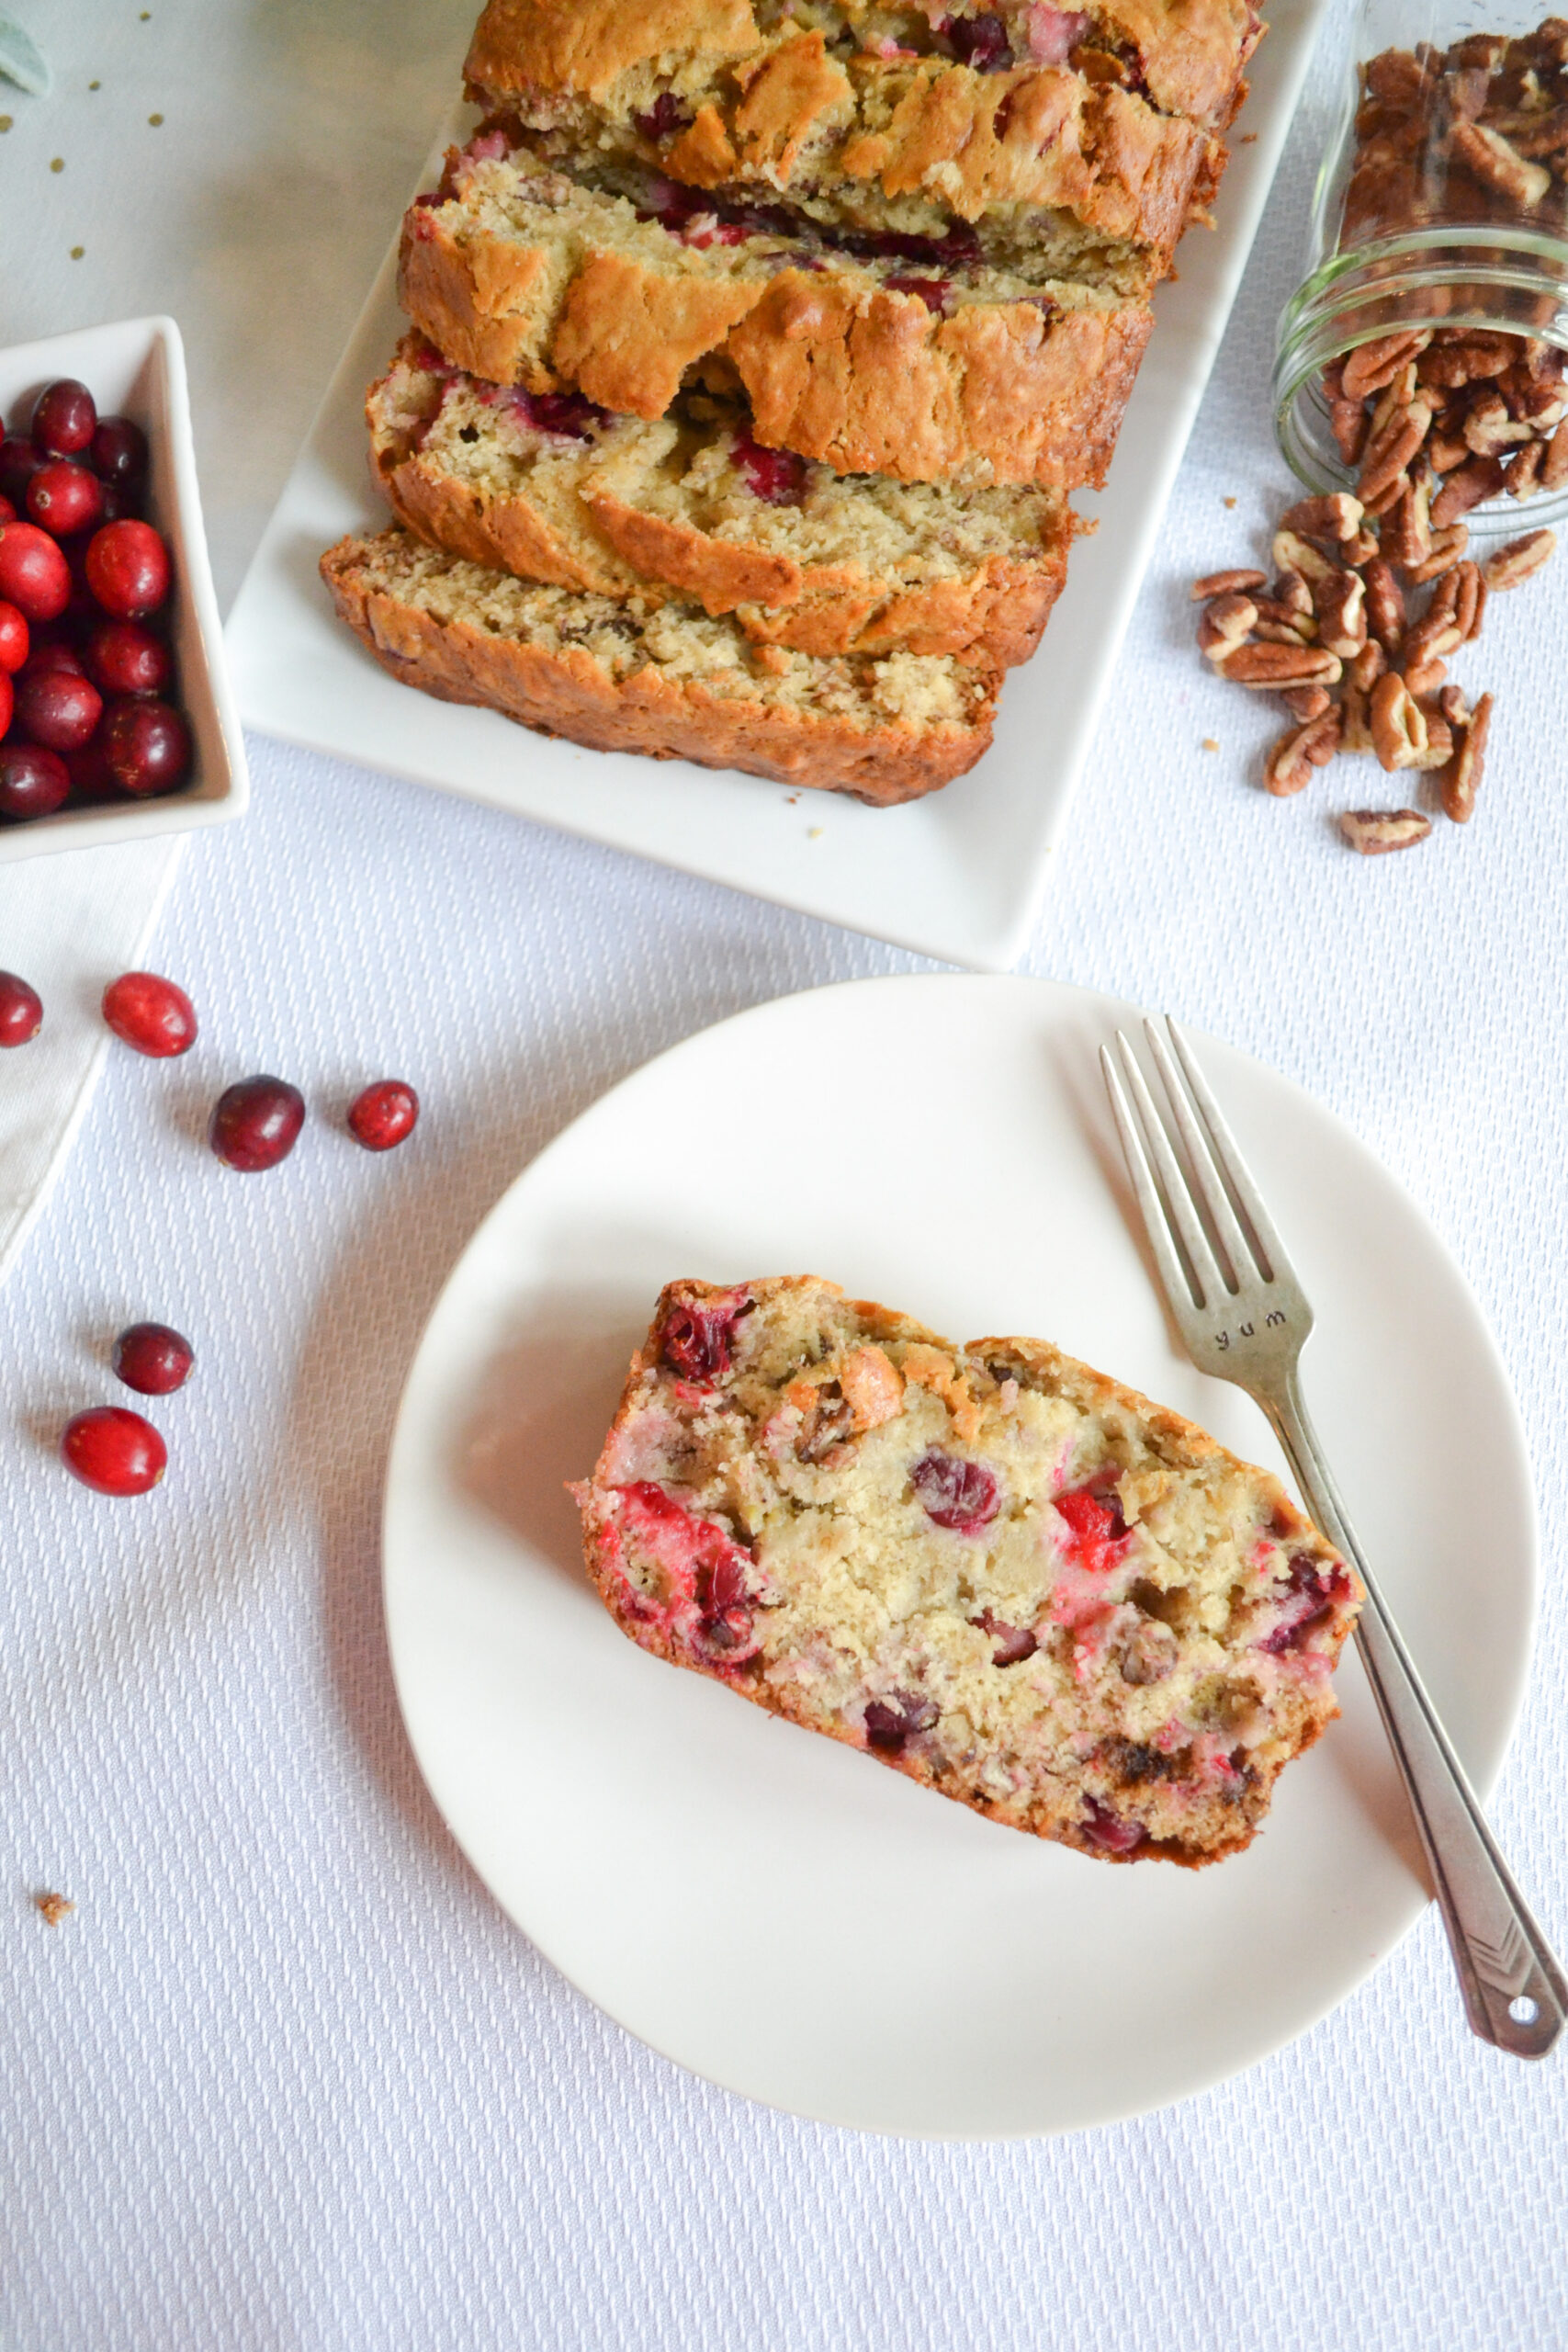
This cranberry banana nut bread is perfectly moist with golden brown edges that have the perfect amount of “crunch.” This bread is great to bake and give to a loved one during the Christmas season, and it also freezes and thaws nicely if you’d like to bake extra!

Here’s a free printable copy of my recipe if you’d like to give it a try:

Cranberry Banana Nut Bread
Print Recipe Pin Recipe

Cranberry Banana Nut Bread

Ingredients

  • 1/4 cup butter softened
  • 1 cup sugar
  • 3 ripe bananas mashed
  • 1/3 cup plain Greek yogurt
  • 2 eggs
  • 2 tsp vanilla extract
  • 2 cups all purpose flour
  • 1 tsp baking soda
  • 1/2 tsp salt
  • 1 cup fresh cranberries
  • 1/2 cup chopped pecans or walnuts

Instructions

  • Preheat oven to 350 F
  • In a large mixing bowl, combine softened butter and sugar
  • Add in mashed banana, eggs, yogurt and vanilla and stir until just combined
  • Add in flour, baking soda and salt and stir until just combined - do not over stir
  • Fold in cranberries and nuts
  • Pour batter into a greased 5x9 loaf pan
  • Bake for 50-55 minutes, or until toothpick inserted in middle of bread comes out clean

Tried this recipe?

Tag me on Instagram: @SouthernMadeSimple or use the hashtag #SouthernMadeSimple and share your love of southern cuisine!


Cranberry Banana Nut Bread

Be sure to scroll down to the bottom of this post to find more recipes featuring cranberries! If you’ve got some leftover from Thanksgiving, this bread is a perfect place to put those berries to good use!

If you like this recipe, be sure to check out these other great recipes found right here on Southern Made Simple!

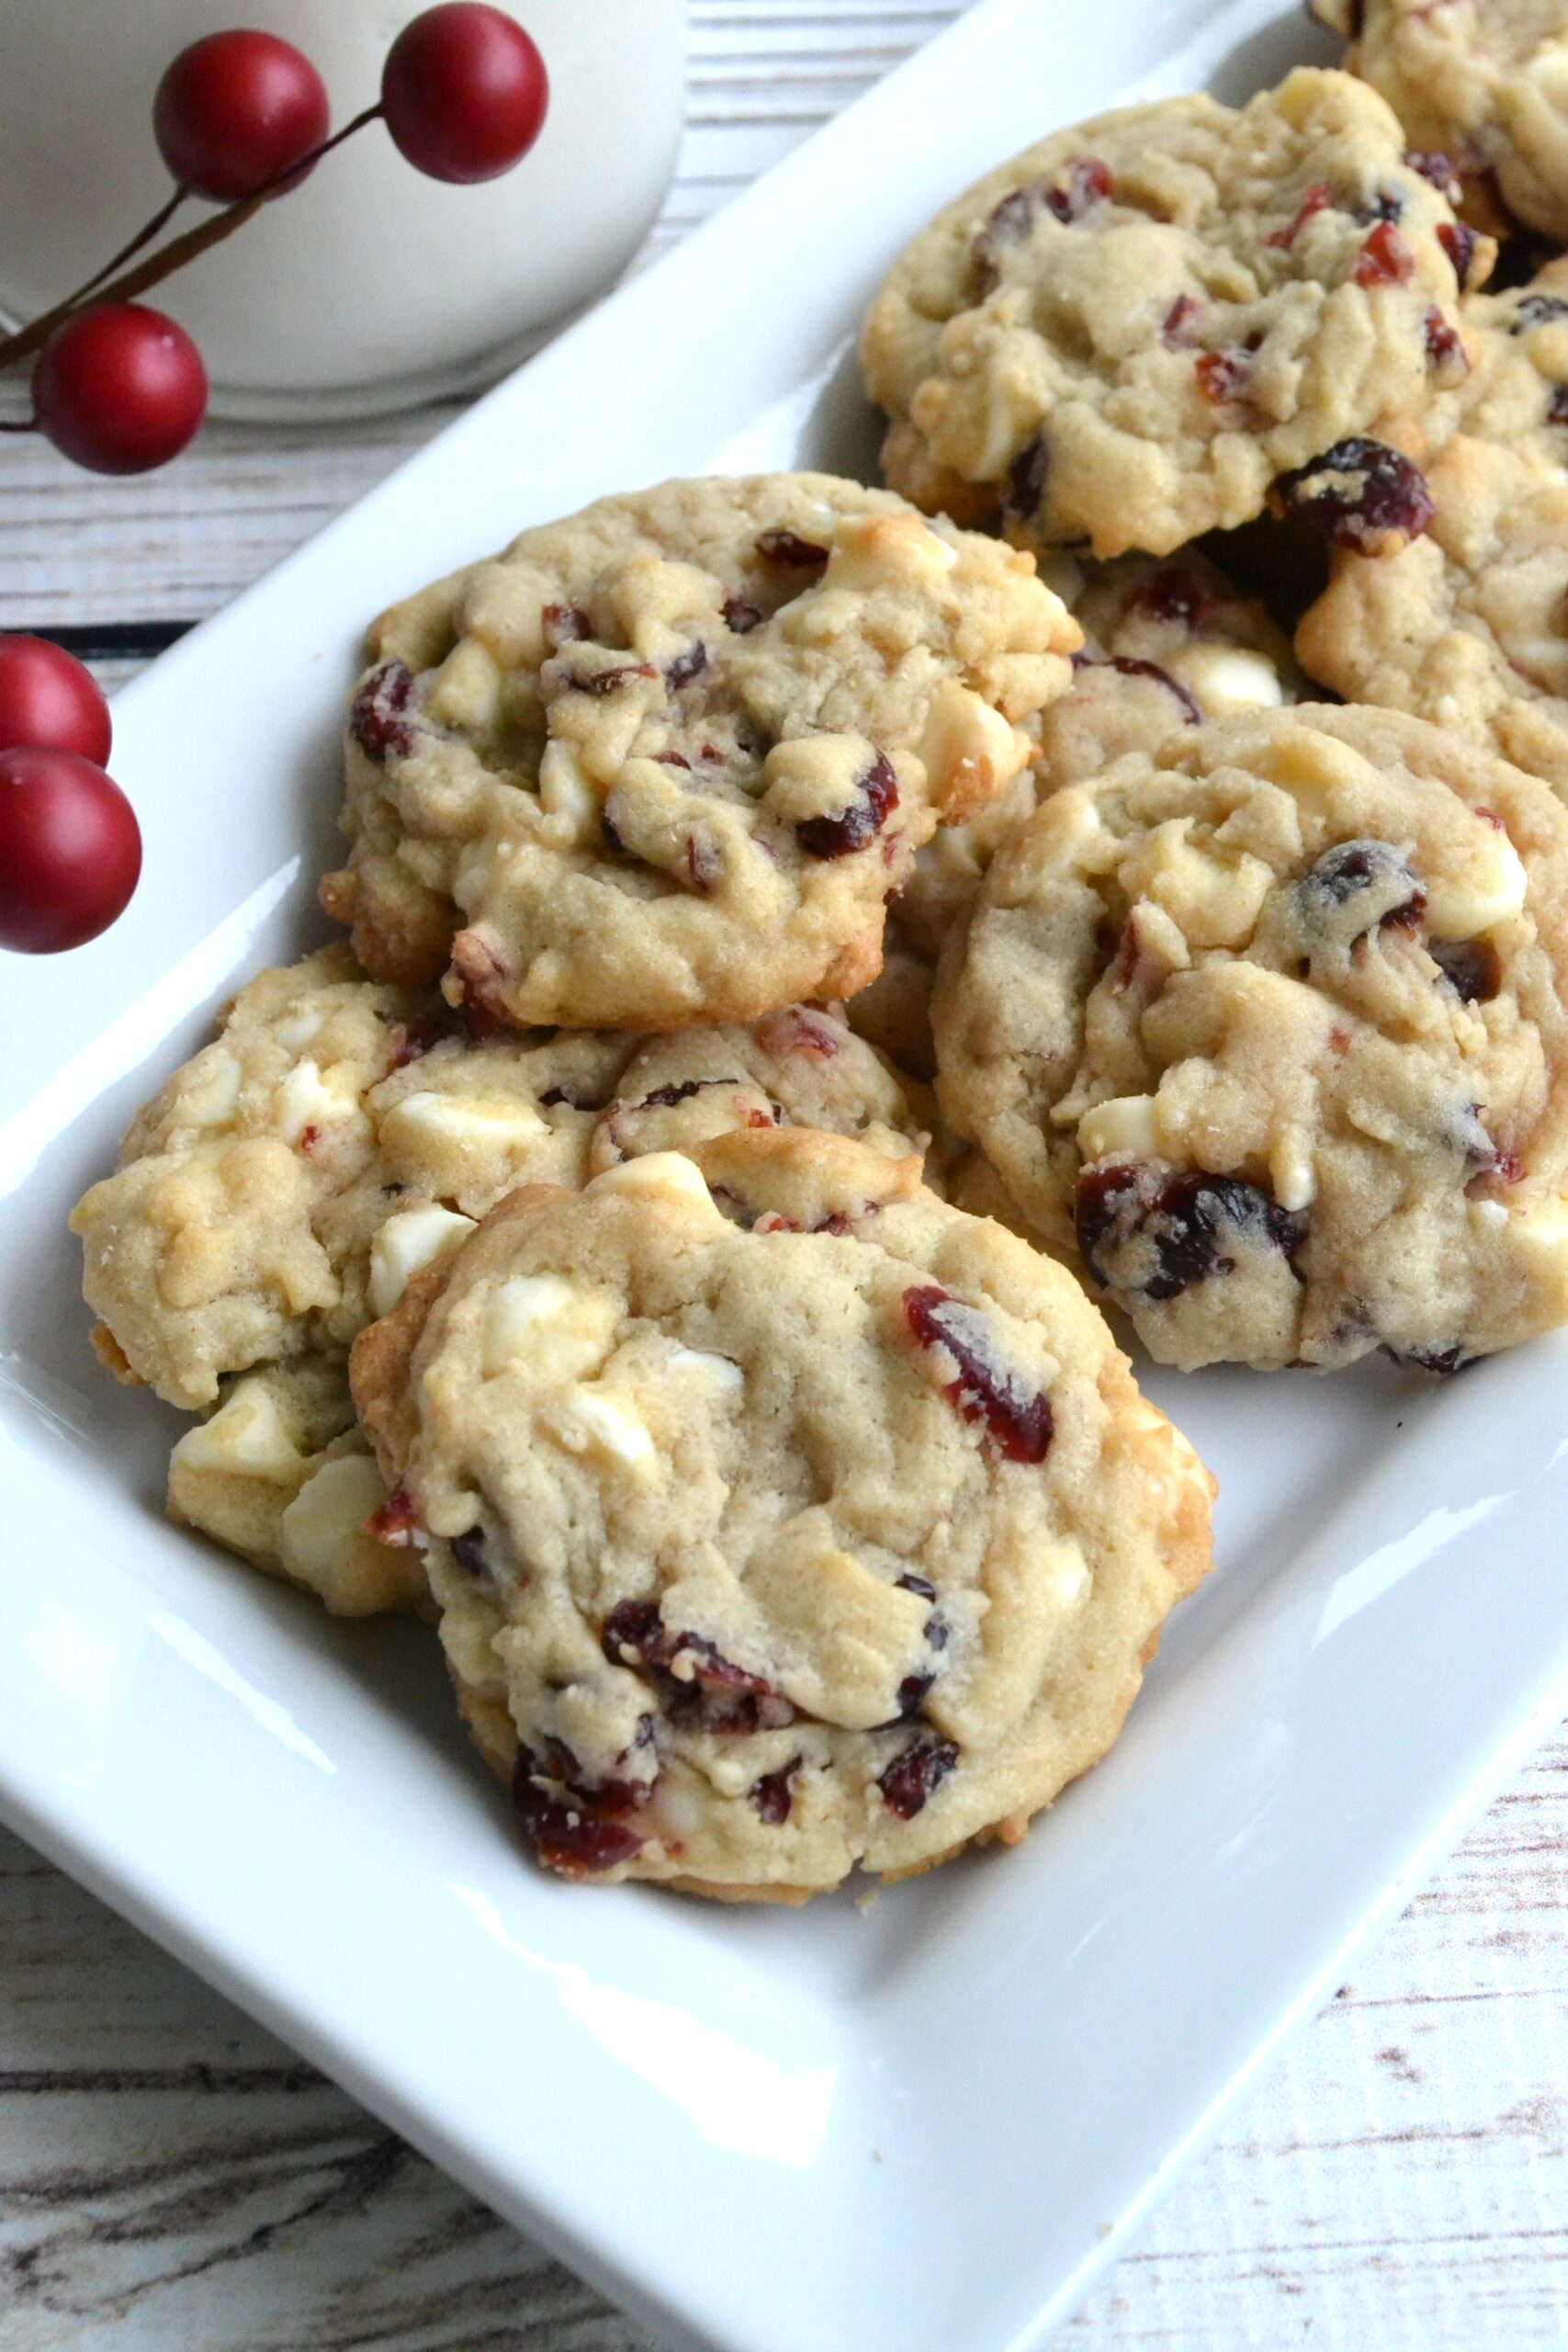
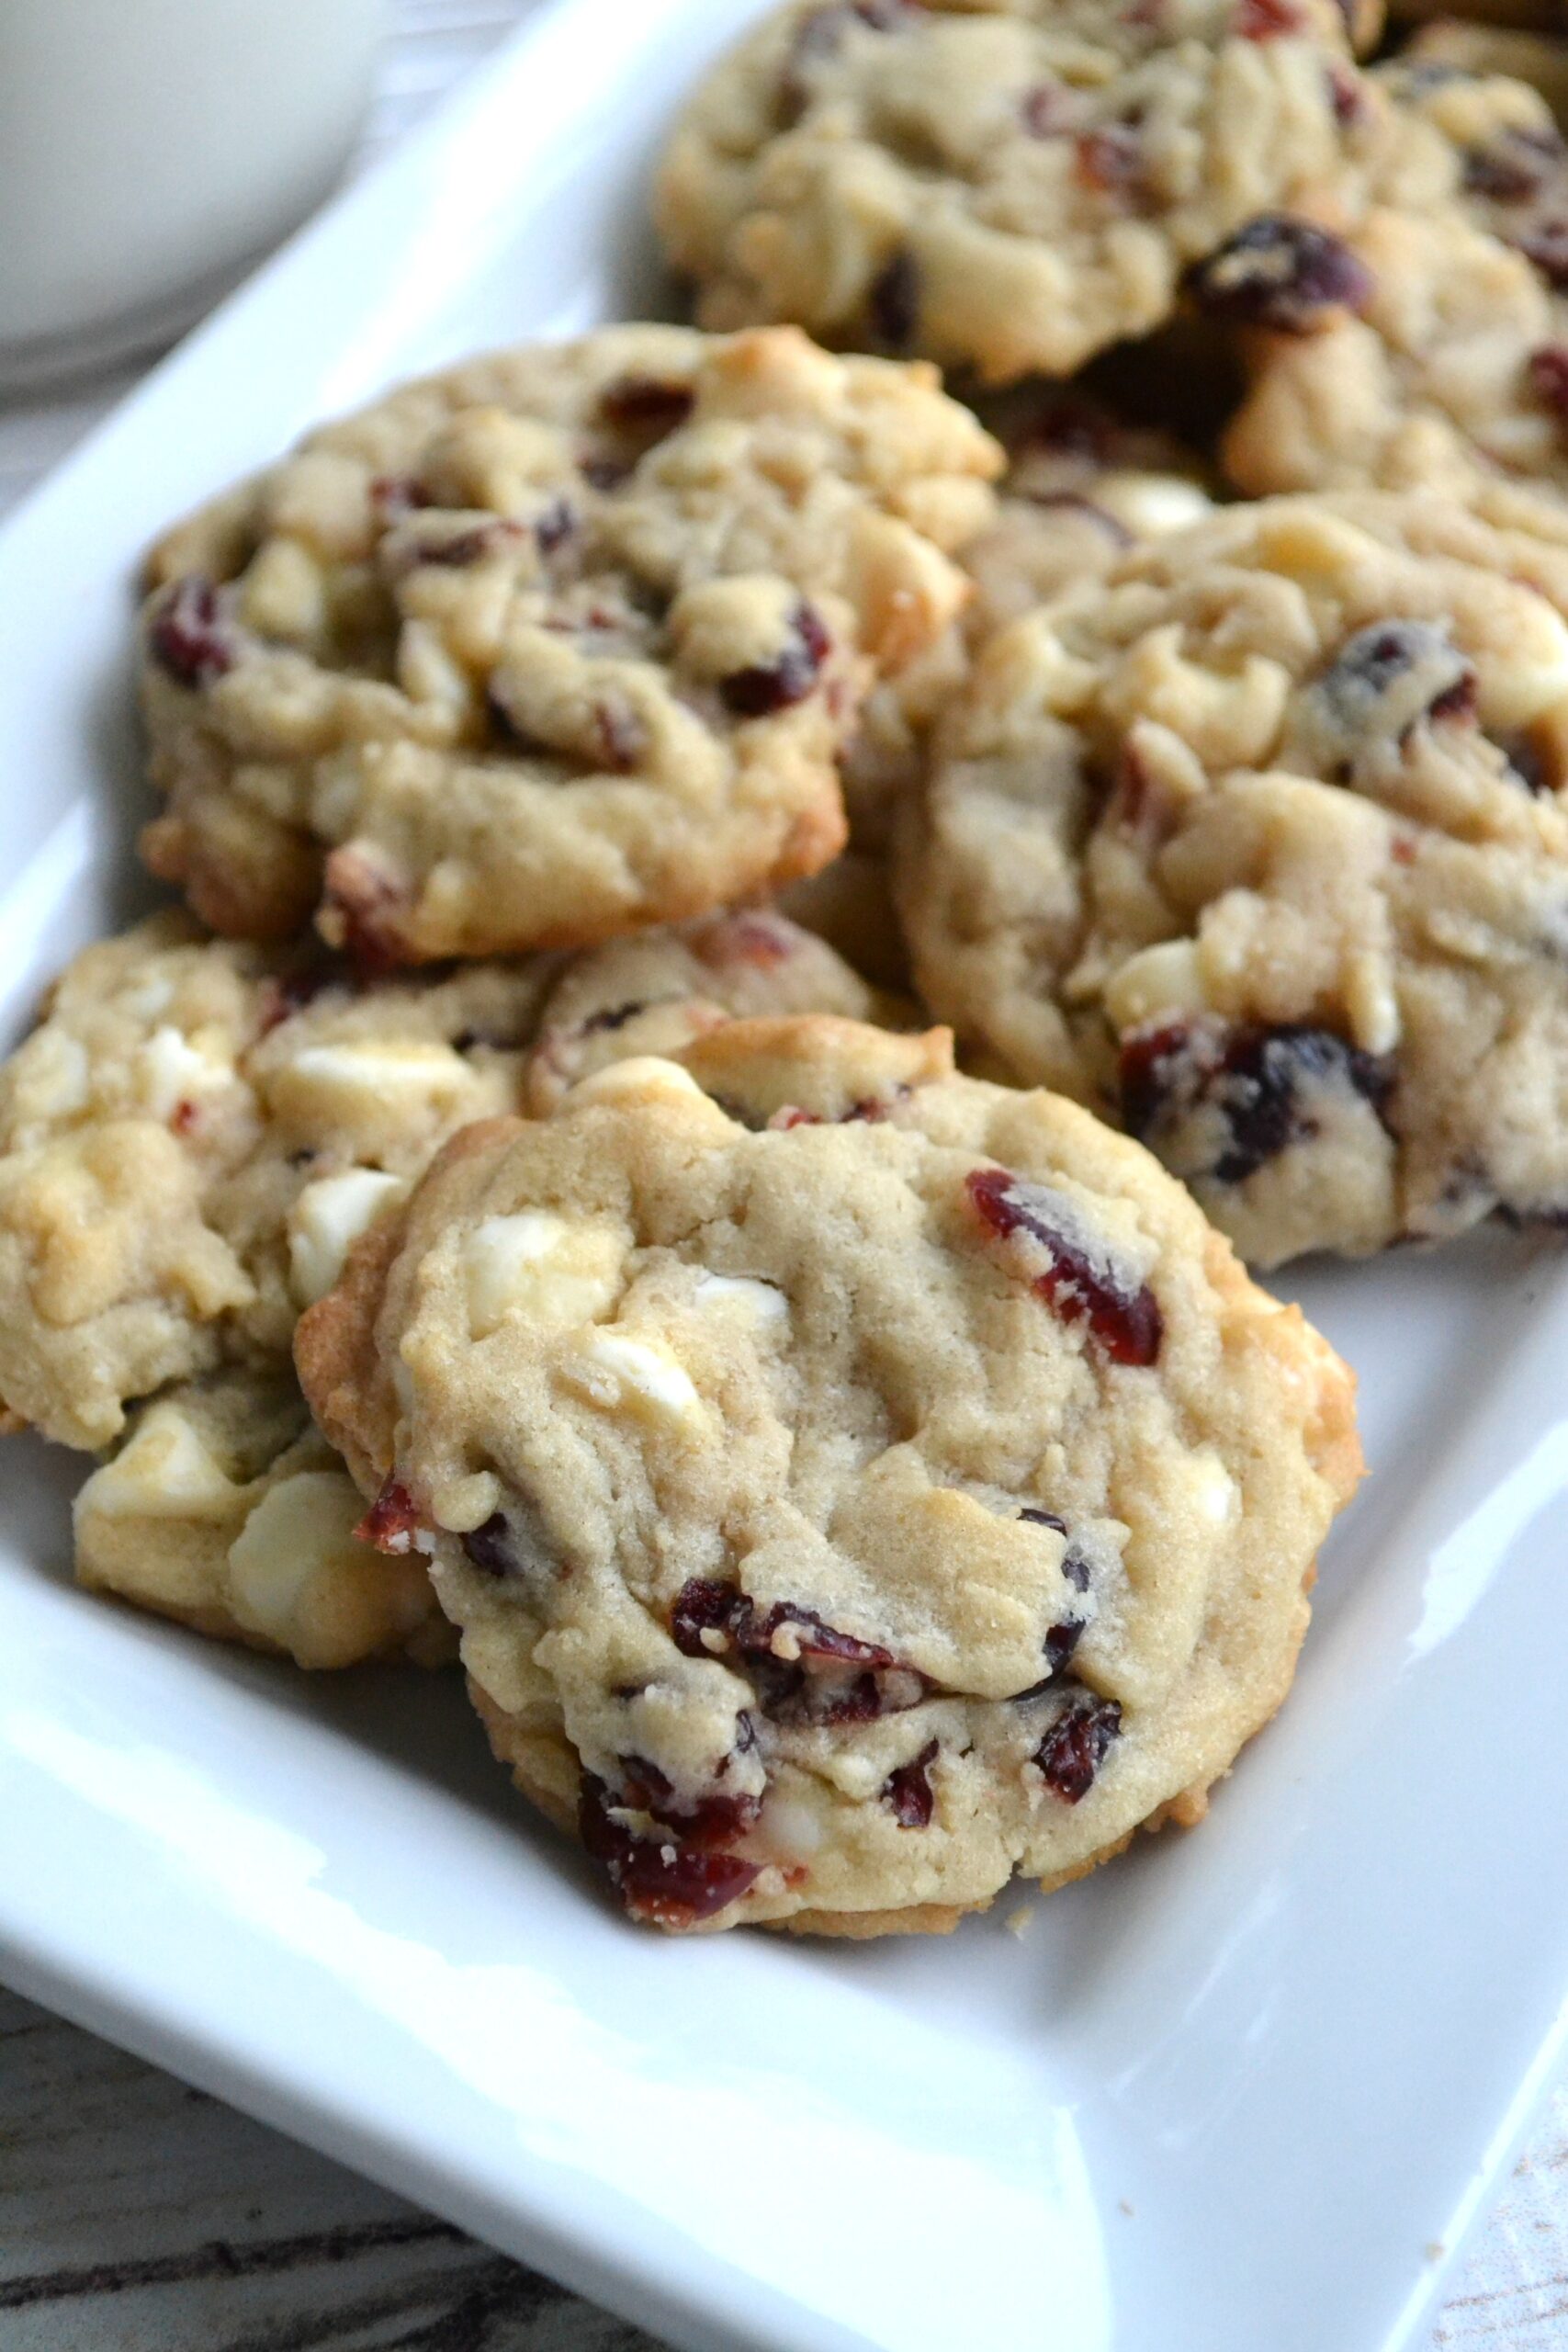
Banana Nut Squash Bread | Soft & Chewy White Chocolate Cranberry Cookies | Cranberry Jalapeno Christmas Dip | No Bake Mini Cranberry Cheesecake Trifles | Cranberry Cream Cheese Pound Cake | Sugared Cranberries

Are you doing any special holiday baking this season? If so, I’d love to hear what you’ve got cookin’ in your kitchen! Drop a comment below and share what you’re making for the holidays. I hope you and your family truly have a happy, safe and wonderful Christmas season!

Filed Under: Desserts, Home Cookin' Tagged With: Banana Nut Bread, Banana Nut Cranberry Bread, Cranberry Bread

Southern Cornbread Dressing

November 17, 2020 by Laura Tucker Leave a Comment

This recipe for Southern Cornbread Dressing is a true southern staple dish to serve during the holiday season. Made with homemade cornbread from scratch, this recipe makes coming home for Thanksgiving even more spectacular!

Southern Cornbread Dressing

It’s absolutely not a certified southern Thanksgiving dinner unless there’s a big pan of homemade dressing sitting next to the turkey. Cornbread dressing is comfort food at it’s finest, and it’s always served with either a spoonful of cranberry sauce or a drizzle of gravy right on top. Truth be told, I think the dressing is more of the star of the Thanksgiving feast than the turkey is. I may not go back for seconds for the turkey, but you can bet your bottom dollar that I’ll be getting a second helping of dressing!

Southern Cornbread Dressing

I was always taught to make my dressing with day-old cornbread. It’s not imperative that you do that, but using day-old cornbread is preferred by many as old cornbread soaks up more of the broth and produces a better texture and consistency in the dressing. All that is to say – don’t skip this part! If you’re serving this for Thanksgiving dinner, you’ll want to make sure you plan ahead and get that skillet of cornbread in the oven the day before. You’ll also want to make sure you have about half a loaf of white bread on hand that is also a few days old. This recipe calls for thumb-size pieces of white bread to go with the day-old cornbread to help really lock in the moisture in the dressing.

Southern Cornbread Dressing

Despite what many people may believe, dressing and stuffing, in my opinion, cannot be used interchangeably. Even though there are many similarities, traditional Southern Cornbread Dressing is different from “stuffing” for a few reasons. Stuffing is typically known to be a bit herbier, with sage being the stand-out herb used. While many dressing recipes do call for sage and other seasonings (such as this recipe,) you’ll frequently find that many omit the sage all together. Stuffing also typically uses larger chunks of bread, while cornbread dressing uses a very finely ground cornbread as its base. Dressing is usually more moist while stuffing tends to be a bit drier, and then of course there’s the whole “stuffing it inside a turkey” thing. While I think the practice of literally stuffing the bird is fading out a bit, cornbread dressing is never stuffed inside a turkey where as stuffing traditionally is.

Southern Cornbread Dressing

My grandmother’s signature in her dressing was adding just a smidge of nutmeg. It’s not anything that really stands out in the dish, but I love adding it in because that’s exactly what she did. I never got to sit down and have a Thanksgiving dinner with her, but I’d like to think she’d be proud that I add in the nutmeg in memory of her. 

Are you ready to make a big ol’ helping of southern cornbread dressing? Here’s everything you’ll need to get started:

Southern Cornbread Dressing
Print Recipe Pin Recipe

Southern Cornbread Dressing

Ingredients

Cornbread:

  • 2 cups self-rising cornmeal
  • 5 eggs
  • 1 1/4 cup whole buttermilk
  • 1 Tbs canola or vegetable oil for greasing the skillet

Cornbread Dressing:

  • Crumbled day-old cornbread
  • 6-8 slices white sandwich bread gently torn into thumb-size pieces
  • 2 large yellow or white onions very finely chopped
  • 1 bunch celery both ends removed and very finely chopped
  • 2 cups chicken broth
  • 1 26 oz family size can Cream of Chicken Soup
  • 1 Tbs rubbed sage
  • 1 tsp poultry seasoning
  • 1/2 tsp ground nutmeg

Instructions

For Cornbread:

  • Preheat oven to 400 F
  • Pour oil into iron skillet and roll oil around thoroughly to ensure the entire pan is coated with oil
  • In a large bowl, combine corn meal, eggs and buttermilk and stir
  • Pour batter into greased skillet and bake for 22-25 minutes, or until it's just lightly golden on the top and around the edges. Don't overbake!
  • Crumble cornbread very finely, making sure there are no chunks larger than the size of your pinky nail.
  • Cover crumbled cornbread and set aside for a day or overnight.

For Cornbread Dressing:

  • Grease a large casserole dish (9x13 or larger)
  • Preheat oven to 350 F
  • Combine very finely diced onions and celery in a stockpot and add just enough water to cover the top of the onions and celery
  • Boil until the celery is good and tender, or to your liking. Do not drain. You'll use the broth off of the vegetables in the dressing.
  • Transfer crumbled corn bread to a very large mixing bowl and place torn white bread right on top - do not stir in
  • Pour onion and celery mixture over cornbread, followed by the can of cream of chicken, 2 cups chicken broth, and your seasonings.
  • Pour into greased baking dish and bake uncovered for 55-60 minutes, or until bubbling and a nice thin crust has formed around the edges
  • Serve with turkey, cranberry sauce and all of your favorite fixin's!

Tried this recipe?

Tag me on Instagram: @SouthernMadeSimple or use the hashtag #SouthernMadeSimple and share your love of southern cuisine!

If you have ample leftovers, dressing will freeze well so you can enjoy it again later! Just add a little chicken broth to liven it back up, warm all the way through and enjoy all over again!

Southern Cornbread Dressing

What is your favorite Thanksgiving side dish? Do you prefer cranberry sauce or gravy on top of your dressing? Leave a comment below and share the love!

Happy Thanksgiving, y’all!


If you’ll have little ones running around the house during Thanksgiving this year, be sure to take a look at these fun Thanksgiving Themed Snack Crafts for them to make and share!

Filed Under: Casseroles & Comfort Foods, Home Cookin' Tagged With: Cornbread dressing, Southern Cornbread Dressing, Southern Dressing, Southern Thanksgiving Dressing, Thanksgiving cornbread dressing, Thanksgiving dressing

Soft & Chewy White Chocolate Cranberry Cookies

November 15, 2020 by Laura Tucker Leave a Comment

These Soft & Chewy White Chocolate Cranberry Cookies are a perfect holiday treat to indulge in! Grab a cup of coffee or a tall glass of milk and enjoy!

I need y’all to hear me on this. Clean out your ears real good and make sure you’re listening very closely, because what I’m about to say is very serious. It is absolutely no exaggeration, and while I understand that it is a bold statement, it’s wholeheartedly true.

White Chocolate Cranberry Cookies

I’ve had a lot of cookies during my time here on Earth. Soft batch, fudgy, cakey, some with nuts, some with various types of chocolate chips. I’ve loved nearly every cookie I’ve tried. Some tries were just likes and not loves, but for the most part I’m a cookie-kinda-girl and I’ve never been mad at a cookie. I even like the super cheap ultra-manufactured nothing-special cookies. You know, those butter cookies you had every year at VBS as a kid that you stuck your finger through the middle and wore like they were edible rings? I love those, too. They’ve got a special place in my heart.

But these? These cookies are my favorite cookies in the entire world. Granted, I know I’ve never tried every cookie in the world, but at this point I don’t feel like I need to. I’ve found true love, and it’s baked right into these Soft & Chewy White Chocolate Cranberry Cookies. 

I can’t put my finger precisely on it – maybe it’s the copious amounts of butter, or the richness of the brown sugar. Maybe it’s the fact that these cookies are perfectly chewy and soft, but sturdy enough to dunk in your morning coffee or glass of milk without it crumbling straight to the bottom of your glass. Or perhaps it’s the bits of tart cranberry tucked inside coupled with the sweetness of those white chocolate morsels. Whatever it is, the world needs more of it. Especially in this dumpster-fire of a year 2020.

If you’ll be doing a little holiday baking this year, this recipe is a must-try. I promise you. Bake some for you, bake some for your neighbors down the street, or make them as a treat for your family for getting through an incredibly tough year. Honestly, just bake them because it’s a random Tuesday. You don’t need a reason!

Here’s a free printable copy of my recipe if you’d like to give it a try!

White Chocolate Cranberry Cookies
Print Recipe Pin Recipe

Soft & Chewy White Chocolate Cranberry Cookies

Ingredients

  • 2 cups all purpose flour
  • 3/4 cup salted butter room temperature
  • 1/2 cup sugar
  • 1/2 cup brown sugar
  • 1 egg
  • 1 tsp baking soda
  • 2 tsp corn starch
  • 1/4 tsp salt
  • 1 Tbs vanilla flavoring
  • 1 cup dried sweetened cranberries
  • 1 cup white chocolate chips

Instructions

  • In a large mixing bowl using a hand or stand mixer, combine butter, white sugar and brown sugar.
  • Add in vanilla and egg and mix until incorporated.
  • Slowly add in flour, corn starch, baking soda and salt and mix until a soft, thick dough forms.
  • Add in dried cranberries and white chocolate chips and stir until just combined.
  • Refrigerate for 1 hour or longer. (Don't skip this step!)
  • Preheat oven to 350 F and spray a baking sheet with non-stick cooking spray or use a non-stick silicone baking mat
  • Once dough is thoroughly chilled, roll or scoop into 2 inch balls and place about an inch or more apart on the cookie sheet
  • Bake for 10-11 minutes. *Cookies will appear undercooked when first removed from the oven. Do not cook any longer - the cookies will continue to set while left to cool on the cookie sheet.
  • Allow to cool at least 10 minutes before serving. Enjoy!

Tried this recipe?

Tag me on Instagram: @SouthernMadeSimple or use the hashtag #SouthernMadeSimple and share your love of southern cuisine!

White Chocolate Cranberry Cookies

If you like this recipe, be sure to check out these other great cookie recipes found right here on Southern Made Simple!

Strawberry Milkshake Cookies | Salted Caramel Peanut Butter Cookies | Molasses Cookies | Banana Nut Cranberry Cookies | Red Velvet Crinkle Cookies | Cool Whip Cookies | Hot Chocolate Marshmallow Cookies | Chocolate Covered Cherry Cookies | Cookies for Santa

Filed Under: Desserts, Home Cookin' Tagged With: Christmas cookies, Cranberry Cookies, White Chocolate Cranberry Cookies

Pumpkin Cream Cheese French Toast Bake with Salted Caramel Coffee Sauce

November 2, 2020 by Laura Tucker Leave a Comment

This shop has been compensated by Inmar Intelligence and its advertiser. All opinions are mine alone. #TogetherWithRedDiamond

As I curl up in a blanket on my couch and pause for a moment to begin planning our holiday meals for my family, I can’t help but be swept away with an overwhelming sense of gratitude. Sure, our time with our extended family has been put on pause, and our traditional large meals gathered around the dinner table during the holidays will look a little different for now, but changing my perspective to focus on the positives of this year instead of the negatives has really helped me draw from a place of gratitude for the things that I have rather than sadness over the things I cannot have.

Pumpkin Cream Cheese French Toast Bake with Salted Caramel Coffee Sauce

One positive is that even though I won’t be fixing meals for a larger number of people, I am still able to fix some of my all-time favorite seasonal meals for my immediate family this season, and nothing makes us all feel the goodness of fall quite like my Pumpkin Cream Cheese French Toast Bake with Salted Caramel Coffee Sauce. I’ve always been big on making breakfast time extra special during the holiday season, and there is nothing better than having a warm slice of this French toast goodness with a hot cup of coffee in hand.

And speaking of coffee, the star ingredient of this French toast bake is a salted caramel coffee sauce to pour over each slice in place of traditional syrup. The caramel has just enough hint of coffee flavor in it to make any coffee lover smile, and swirling a bit of it into my cup takes my morning coffee time to a whole new level.


Hover over the image above to find Red Diamond® Coffee products at a store near you!

My husband and I love to enjoy a morning cup of coffee together each day, and I always keep my coffee bar stocked during the holiday season so any guests or family members can help themselves to a fresh pot while they’re here. Lately I’ve been brewing Red Diamond® Classic Blend Ground Coffee, and each sip has been just like a warm and much needed hug from an old friend.

As a native Alabamian, it always makes my heart happy to support businesses that are here in my own state. Red Diamond Coffee is roasted right here in Alabama, and it’s made from the highest quality 100% Arabica coffee. Only the best high-grown coffee beans are used, and they’re all handpicked and roasted in the world’s finest Scolari Roasters. The fresh and warm flavors are something I can truly appreciate during this season, and this coffee makes for a perfect pairing with a plate of this French toast bake!
Pumpkin Cream Cheese French Toast Bake with Salted Caramel Coffee Sauce

Making this Pumpkin Cream Cheese French Toast Bake is very simple and straightforward. This dish feeds our family of 4 with plenty of leftovers, so if you’re visiting with a few extended family members this season, this bake is perfect for feeding several people. To get started, you’ll want to use day-old bread or a loaf of French or Italian bread cut into cubes and toasted at 300°F for 15 minutes, or until firm.

Next, cube a brick of cream cheese into small pieces and toss them in with the bread crumbs into a 9×13 casserole dish. In a large bowl, whisk together eggs, 1 can of pumpkin puree, sugar, milk, vanilla, cinnamon and nutmeg and pour over the bead cubes. For the very best results, I like to let the mixture rest in the refrigerator for a few hours before baking, but if you’re in more of a hurry you can go ahead and pop it in the oven at this point.

Pumpkin Cream Cheese French Toast Bake with Salted Caramel Coffee Sauce

While the casserole is baking, go ahead and combine all of the listed ingredients for the crumble topping. Once the casserole has baked for 20 minutes, add the crumble mixture on top and bake for another 25 minutes. The casserole will make your entire house smell absolutely wonderful, and sinking your teeth into a warm and gooey slice of this French toast bake will make you wish the autumn season could stick around all year long!

But the very best part of the dish is the icing on the cake – or should I say the caramel on the casserole! The salted caramel coffee sauce is absolutely sensational, and using Red Diamond Coffee inside the caramel sauce gives it an extra special touch. I love that Red Diamond is real coffee – handpicked from the world’s finest fields and crafted without compromise. Perfect’s not easy, but honestly this coffee makes perfection seem effortless! I always pick up my Red Diamond Coffee at my local Publix, but you can check this store locator to see where Red Diamond Coffee is sold near you!

Once the Pumpkin Cream Cheese French Toast Bake is out of the oven, drizzle the homemade salted caramel coffee sauce on top, and don’t forget to add a smidge into your coffee, too!

Here’s a free printable copy of the recipe if you’d like to give it a try:

Pumpkin Cream Cheese French Toast Bake with Salted Caramel Coffee Sauce
Print Recipe Pin Recipe

Pumpkin Cream Cheese French Toast Bake with Salted Caramel Coffee Sauce

Ingredients

For French Toast:

  • 1 loaf Italian or French bread cubed and toasted at 300 F for 15 minutes
  • 1 8 oz plain cream cheese cubed into small pieces
  • 8 eggs
  • 1 cup milk
  • 1 15 oz can pumpkin puree
  • 1/2 cup white sugar
  • 1 tsp cinnamon
  • 1/2 tsp nutmeg
  • 1 tsp vanilla

For Topping:

  • 1/2 cup brown sugar
  • 1/2 cup all purpose flour
  • 1 stick salted butter cold and cubed
  • 1 tsp cinnamon
  • 1/2 tsp nutmeg

For Caramel Sauce:

  • 1 cup sugar
  • 2 Tbs Red Diamond Classic Blend Ground Coffee
  • 3/4 cup water
  • 5 Tbs butter cubed
  • 3/4 cup heavy whipping cream
  • 1/4 tsp vanilla
  • 1/4 tsp sea salt

Instructions

For French Toast Bake:

  • Cube loaf bread into small pieces and toast in over at 300 F for 15 minutes
  • Remove from oven and place in a greased 9x13 casserole dish
  • Preheat oven to 350 F
  • In a large mixing bowl, combine eggs, milk, pumpkin puree, white sugar, cinnamon, nutmeg and vanilla
  • Cube cold cream cheese and sprinkle amongst bread cubes
  • Pour egg mixture over the bread. For best results, allow bread mixture to set in refrigerator for a few hours before baking. However, baking at this point will be fine as well.
  • Bake for 20 minutes, then add topping (below) and bake for an additional 25 minutes.

For the topping:

  • While french toast is baking, combine all topping ingredients into a large bowl.
  • Using a hand or stand mixer, combine all ingredients until a crumbly mixture forms
  • Sprinkle on top of french toast bake and bake for an additional 25 minutes.
  • Serve with Salted Caramel Coffee Sauce and enjoy!

For Caramel Sauce:

  • Line a coffee cup with a doubled coffee filter. Pour 2 Tbs of Red Diamond Classic Blend Ground Coffee into the filter.
  • Heat 3/4 cup water in saucepan on stove to boiling. Remove only 1/4 cup of water and pour over coffee grounds. Allow to steep for a few minutes until cooled down slightly.
  • While the coffee grounds are cooling, whisk sugar into remaining water and bring to a rapid boil. Cover and boil for about 6-8 minutes, or until the sugar and water begin to turn an amber brown color.
  • While the sugar mixture is simmering, remove coffee filter and grounds from coffee mug and gently squeeze the grounds to get any excess liquid out. Discard grounds and filter.
  • Very gently add cubed butter into the boiling sugar mixture, making sure not to splatter the mixture onto your hands. Whisk vigorously as the mixture will begin to bubble quickly.
  • Then slowly add in the heavy cream and whisk until foaming mostly subsides.
  • Add in vanilla, coffee and sea salt.
  • Bring mixture back to a boil to thicken, then remove from heat and allow to cool before serving.

Tried this recipe?

Tag me on Instagram: @SouthernMadeSimple or use the hashtag #SouthernMadeSimple and share your love of southern cuisine!

Pumpkin Cream Cheese French Toast Bake with Salted Caramel Coffee Sauce

I’ll be passing this recipe along to my out-of-town relatives that we will not be able to gather with this year. While we’ll be missing them in person, it warms my heart to know that they’ll have a belly full of goodness to keep the smiles going!

Pumpkin Cream Cheese French Toast Bake with Salted Caramel Coffee Sauce

This fall family-favorite really has a way of bringing us all together, even if we do have to be a little bit farther apart for right now. Brewing a fresh pot of Red Diamond Coffee to pair with it makes this holiday season feel extra nice, and I can’t wait to share a cup with my family this holiday season, even if it is through a computer screen!

If you’re getting a head start on your holiday menu planning like me, be sure to print out a copy of this Pumpkin Cream Cheese French Toast Bake with Salted Caramel Coffee Sauce recipe and grab all of the ingredients needed to make it. And while you’re at it, make sure you pick up a canister of Red Diamond Coffee to go with it!


Filed Under: Breakfast, Home Cookin' Tagged With: Pumpkin cream cheese french toast casserole, Pumpkin french toast, Pumpkin french toast bake, Pumpkin French Toast Casserole, Red Diamond Coffee, Salted Caramel Coffee Sauce

Acorn Muffin Bites

October 12, 2020 by Laura Tucker Leave a Comment

This shop has been compensated by Inmar Intelligence and Entenmann’s® Little Bites. All opinions are mine alone. #SeasonOfLittleBites

When I decided to homeschool my daughter this year, I was excited at the freedom and the possibilities to venture beyond the books and discover new ways of learning through hands-on activities and adventures. The fall season is the perfect time to venture outdoors and study nature, and we’ve been enjoying collecting and gathering acorns, twigs, pinecones, and things of that nature to study more in our at-home kindergarten classroom.

Acorn Muffin Bites

After a recent outdoor scavenger hunt, my daughter’s fascination with acorns was beginning to bloom. She loved how they all had little “hats” on top, and she started her own collection of them inside an old glass jar. This prompted the wheels in my brain to begin turning up new ideas to spark her curiosity and imagination. I opened up a package of Entenmann’s Little Bites® Chocolate Chip muffins for her to enjoy for her afternoon snack, and the idea to create these Acorn Muffin Bites was quickly born!

Acorn Muffin Bites

Entenmann’s Little Bites® muffins have been a staple in our pantry for years. I love them because they contain no high fructose corn syrup and zero (0) grams of trans fat per serving, and she loves them because they’re perfectly soft, easy, and mess-free for her little hands, plus they contain real ingredients like blueberries, strawberries, and in this case – real chocolate chips! The muffins were already the perfect shape to use as the base of the acorn, so while she was snacking I headed back to the pantry to search for some melting chocolate, pretzel sticks and a few chocolate sprinkles to create our own little snack-craft project.

Acorn Muffin Bites

Realizing I needed to add a few things to my grocery list, I hopped online and added more Entenmann’s Little Bites® muffins to my cart, plus a few other things we needed around the house using Walmart’s Online Grocery service. I love being able to conveniently add items I need to my cart from my computer or phone and choosing a time to pick up my groceries at the store that works for me. With a busy homeschooling schedule, I’m thankful to be able to spend less time in-store and more learning and playtime with my girls!

Entenmann’s Little Bites® muffins are available nationwide and come in more than 8 varieties, so there’s truly a flavor to fit every snacking occasion. In addition to the chocolate chip muffins, I also picked up a package of Entenmann’s Little Bites® Blueberry Muffins and Entenmann’s Little Bites® Pumpkin muffins to further celebrate the fall season!

Acorn Muffin Bites

Once I had all ingredients needed on hand, I explained to my daughter that we were going to add a few new acorns to her beloved collection, but this time we weren’t going to keep them in a jar – we were going to eat them! She looked a little puzzled, but she was so excited when I told her that chocolate and sprinkles were involved. These acorn muffin bites are a perfect craft for little hands to get involved with, as there’s no actual cooking or baking required. All we needed was a little melted chocolate almond bark, chocolate sprinkles, and pretzel sticks that were broken in half.

Once the chocolate was melted in the microwave, we dipped the tops of the chocolate chip muffins into the melted chocolate and then added sprinkles on top. We then set them out on a plate to dry and inserted the pretzel stick in the top to serve as the stem. After about 20 minutes, the chocolate was dry and we began to snack away!

Acorn Muffin Bites

Creating these cute little acorn muffin bites using Entenmann’s Little Bites® muffins was a perfect homeschool (or anytime) activity to do with my daughter, and they were a wonderful way to celebrate the goodness found in the changing of the season this year! In addition to making fun snacks like these, we love to enjoy Entenmann’s Little Bites® muffins for any occasion, and we’ll soon be taking them with us on many more outdoor adventures! I love that they’re perfectly pre-portioned and portable your on-the-go needs. They’re a must-have in our house, and they certainly keep the smiles coming!

Acorn Muffin Bites

Next time you’re shopping in-store or online at Walmart, make sure you check out the variety of Entenmann’s Little Bites® muffins (like Pumpkin!) and other varieties such as Entenmann’s Little Bites® Fudge Brownies, plus other NEW flavors coming soon!

Filed Under: Desserts, Home Cookin' Tagged With: Acorn muffins, Entenmann's Little Bites Fall Snacks, Fall Acorn Snacks, Fall Snack Ideas, Fall themed snacks

Mummy Peanut Butter Rice Krispie Treats

October 5, 2020 by Laura Tucker Leave a Comment

These Mummy Peanut Butter Rice Krispie Treats are a spook-tacular treat to serve this Halloween! They’re not your average rice krispie treats, either. They’re packed with peanut butter goodness, plus a smidge of white chocolate that makes them frighteningly scrumptious!

Mummy Peanut Butter Rice Krispie Treats

Halloween is lurking right around the corner, and I’ve been conjuring up a little Halloween-magic in the kitchen this weekend getting my girls into the spooky-spirit! My oldest really loves rice krispie treats, so we put together these delicious Mummy Peanut Butter Rice Krispie Treats using a slightly more sophisticated version of traditional rice krispie treats. 

For these treats, I used my White Chocolate Peanut Butter Rice Krispie Treats recipe that I shared here a few weeks ago. Instead of these rice krispie treats having a sticky texture, they have a creamy and smooth bite to them thanks to a blend of chunky peanut butter and white chocolate almond bark! Add a little drizzle over the top to create a “mummified” look and a few candy eyes and you’ve got an instant Halloween hit! 

Here’s a better look at the recipe if you’d like to give it a try!

Mummy Peanut Butter Rice Krispie Treats
Print Recipe Pin Recipe

Mummy Peanut Butter Rice Krispie Treats

Ingredients

  • 1/2 lb white almond bark (note: most packages are 1 lb exactly)
  • 1 cup crunchy peanut butter
  • 3 1/2 cups rice krispies cereal
  • 1 1/2 cup miniature marshmallows
  • extra melted white almond bark for drizzle
  • Candy eyes

Instructions

  • In a double boiler, melt white almond bark and peanut butter together, stirring frequently
  • In a large bowl, combine cereal and marshmallows
  • Once peanut butter mixture is melted, pour over cereal and stir until well combined and marshmallows are melted
  • Spray 8x8 baking dish or brownie pan with non-stick cooking spray
  • Pour mixture into pan and gently press down with the back of a spoon to flatten and fill the space of the pan
  • Allow to set for 2-3 hours, or until treats are dried enough to hold their shape when cut
  • Melt additional almond bark (just a little bit will do!) and drizzle over treats to make the mummy wraps. While the almond bark is still wet, add candy eyes.
  • Enjoy!

Tried this recipe?

Tag me on Instagram: @SouthernMadeSimple or use the hashtag #SouthernMadeSimple and share your love of southern cuisine!

Halloween Hack: There’s no need to cast a spell on your treats to get them to cut evenly every time! When making brownies and rice krispie treats, I love to use this brownie pan with a built in slicer to get perfect portions every time! 

Mummy Peanut Butter Rice Krispie Treats

If you like these fun treats, you’ll LOVE these other fun Halloween snacks found right here on Southern Made Simple!

Double Chocolate Peanut Butter Rice Krispie Treats | Candy Corn Cookies | The Ultimate Halloween Charcuterie Board | Sweet & Salty Halloween Cookies | Haunted Halloween Pancakes | Halloween Deep Dish Skillet Cookie | Mummy Treats | Halloween Sugar Wafers | Freaky Frankenstein Oreo Pops


Do you like to make special treats for Halloween? What are some of your favorite confections to devour this time of year? Leave a comment below and share the Halloween-love! 

Filed Under: Desserts, Home Cookin' Tagged With: Halloween Rice Krispie Treats, Mummy Rice Krispie Treats

Low Country Boil Foil Packs

September 21, 2020 by Laura Tucker 3 Comments

This shop has been compensated by Inmar Intelligence and its advertiser. All opinions are mine alone. #easylittlepotato

As we inch closer to the month of October, I can finally feel summer fading and the beginning of fall making its presence known. Summer lingers around for quite a long time here in the southern portion of Alabama, and while I’m ready for a new season to roll in, I’ll surely miss these long summer afternoons. While we had a wonderful summer despite the circumstances, I deeply missed gathering with friends and family and sharing food, fun and laughter with them. Here in my neck of the woods, there is no better way to send off the summer than to have a good old fashioned low country boil.

Low Country Boil Foil Packs

So what do you do when you can’t gather as a group for a low country boil like you used to? You simply scale down on the ingredients just a tad and make Low Country Boil Foil Packs in the oven or on the grill!

Making low country boil foil packs is a perfect way to satisfy your craving without having to make a ton of food for the masses. I made these packs for just my husband and I, and while we missed the social element of having a true low country boil, the flavors were absolutely spot on to the real thing, and cleanup was a breeze! 

Low Country Boil Foil Packs

The key to getting the perfect flavors is all in the ingredients. One thing I really love about a low boil is that they actually require very few ingredients. To make these low county boil foil packs, you’ll need about a pound of white colossal shrimp, a few ears of yellow corn, sausage links, Creamer potatoes, olive oil and creole seasoning. 

When choosing which potatoes to use in these low country boil foil packs, I made a beeline straight for The Little Potato Company Dynamic Duo Creamer potatoes in the 1.5 lb bag. When you’re making a foil pack that contains shrimp, it’s important to be aware of the cook time so as to not overcook the shrimp. Knowing that large baking potatoes take the longest time to cook, it’s important to choose a little-sized Creamer potato. The Little Potato Company really hits a home run with their bags of fresh Creamer potatoes. Little Time, Little Potatoes, Big Flavor – and that’s exactly what I’m going for!

Low Country Boil Foil Packs

All of the Creamer potatoes in their packages are consistently sized, so each one cooks to the same doneness. There is also no peeling or cleaning required either, as they’re meant to be eaten with their naturally nutritious skins on. These Creamer potatoes are the littlest in the potato family and are meant to be bite-sized, just like cherry tomatoes are in the tomato family. They have a beautifully creamy and buttery taste and a perfectly soft texture. They are absolutely the perfect Creamer potato to choose for a low country boil, especially a scaled down version just like these foil packets!

All ingredients needed to make these low country boil foil packs are available at your local Walmart. When purchasing the ingredients, I was able to add everything I needed to my cart using the Walmart Online Grocery Pickup app. I made sure to add my favorite varieties to my “favorites” in the app by clicking the heart in the top right so that I can come back to them quickly and repurchase them.

Low Country Boil Foil Packs

One thing I love the most about these foil packs is that there is very little prep work that needs to be done. It’s really as easy as chop, wrap and bake! To get things started, I emptied the bag of The Little Potato Company’s Creamer potatoes into a microwave safe bowl. The front of the package highlights that you can cook these Creamer potatoes in just 5 minutes in the microwave, which is fabulous for creating delicious meals in a jiffy! I opted to cook them about halfway, so 2.5-3 minutes before adding them to the foil packs just to make sure they cooked all the way through.

Low Country Boil Foil Packs

While the Creamer potatoes were in the microwave, I chopped the ears of corn into 3 or 4 small sections and chopped the sausage into wedges. I opted to keep the skin on the shrimp simply because it made me feel like I was enjoying all of this delicious food at a true boil. Sitting around a table and peeling and eating shrimp together is part of the fun at a low country boil in my opinion, so I wanted to accomplish something very similar with these foil packs. However, if you’re looking for an option that’s a little less messy, so ahead and peel the shrimp first before cooking. 

Low Country Boil Foil Packs

Once all the ingredients were chopped and ready to go, I combined everything in a large mixing bowl and added the olive oil and creole seasoning. After giving it all a good shake to ensure all ingredients were coated with the oil and seasoning, I divided up the contents into foil packets and wrapped up each packet tightly, making sure there were no holes visible. You want to get the packets good and tight so that they food can steam together and cook in the juices of the sausage and shrimp. 

Low Country Boil Foil Packs

After only 20 minutes in the oven, the foil packs are ready to be opened and devoured! Here’s a printable copy of the complete recipe if you’d like to give it a try:

Low Country Boil Foil Packs
Print Recipe Pin Recipe

Low Country Boil Foil Packs

Prep Time5 mins
Cook Time18 mins

Ingredients

  • 1 lb colossal white shrimp cleaned, peeled and deveined *see note
  • 1.5 lb bag The Little Potato Company Fresh Creamer potatoes cooked in microwave according to package instructions
  • 1 lb smoked sausage cut into 1 inch pieces
  • 2 ears yellow corn cut into 4 pieces
  • 1 Tbs creole seasoning
  • 2 Tbs olive oil
  • 1-2 garlic cloves per packet optional
  • fresh chopped parsley minced
  • salt and pepper to taste
  • lemon juice optional

Instructions

  • Preheat oven to 425 degrees
  • Cook The Little Potato Company Fresh Creamer potatoes in microwave according to package instructions. (I used the Dynamic Duo variety)
  • In a large bowl, combine all ingredients except garlic cloves and stir together until all ingredients are thoroughly coated in oil and seasoning
  • Tear off 4 sheets of foil (roughly 12x18 in size) and divide the mixture evenly into the middle of each packet If adding a clove of garlic, go ahead and do that now.
  • Roll up all sides of the foil to create a nice and tight packet, making sure there are no visible holes
  • Bake in oven for 18-20 minutes, or until all ingredients are thoroughly cooked
  • Garnish with additional fresh parsley and freshly squeezed lemon juice if desired
  • Enjoy!

Notes

I opted to not peel my shrimp in this recipe to make it feel more like a true authentic low country boil, however, if you're looking for less mess, go ahead and peel them ahead of time!

Tried this recipe?

Tag me on Instagram: @SouthernMadeSimple or use the hashtag #SouthernMadeSimple and share your love of southern cuisine!

For a fun added touch, I served these foil packs to my family inside those little red plastic restaurant baskets lined with newspaper. Most low country boils are eaten around a large table lined with newspaper and the food is poured right down the middle of the table so people can grab the food right in front of them and eat. Adding the newspaper in the baskets made it feel like we were really getting to enjoy a true low country boil, but on a much simpler scale. It was fantastic!

Low Country Boil Foil Packs

If you’re missing fun activities involving food-related social gatherings like low country boils, getting creative and making substitutions like creating individual foil packs is a great way to relive some of those fun times again! Next time you’re at Walmart, swing by the produce section and look for The Little Potato Company Fresh Creamer potatoes to go along with your next meal, be it a low country boil or a simple side dish!

Filed Under: Casseroles & Comfort Foods, Home Cookin' Tagged With: How to make a low country boil in the oven, Low country boil foil backs, Shrimp boil foil packs

Butternut Squash Meatball Stroganoff

September 17, 2020 by Laura Tucker Leave a Comment

This post was sponsored by Carando as part of an Influencer Activation for Influence Central and all opinions expressed in my post are my own.

The changing of the seasons is always an exciting transitional time for me. While many changes have happened this year that weren’t exactly my favorite, I’m reminded that I can celebrate the newness of the season by making small and simple changes in my everyday life, such as in the meals I prepare for my family. As summer fades into fall, I’ve been finding new ways to utilize fall and winter produce into my cooking, and this recipe for Butternut Squash Meatball Stroganoff is a fun fall-inspired twist on a favorite classic dish!

Butternut Squash Meatball Stroganoff

Even though butternut squash is much thicker than summer squashes such as yellow squash and zucchini, it can be spiralized and turned into noodles to use in place of pasta in your favorite pasta dishes. I love that it has a more subtle flavor, making it easy to replace other ingredients without much change to the overall flavor. Using it in place of pasta is a wonderful way to increase your fiber intake and incorporate more vegetables into your overall diet.

Butternut Squash Meatball Stroganoff

Even though traditional stroganoff uses a wider noodle such as egg noodles, the spaghetti-like butternut squash noodles in this dish really make this Italian-style meal feel brand new, while keeping those classic stroganoff flavors that I’ve always loved.

 Utilizing fresh ingredients in my meals is important to me, and incorporating fresh Carando Meatballs in this recipe added a perfect robust flavor that really gave it an authentic Italian style – and in less than 30 minutes! All Carando products are high quality and use premium Italian ingredients, and I was able to conveniently pick them up during my most recent grocery shopping trip in the refrigerated section of the meat department!

Butternut Squash Meatball Stroganoff

I selected the Carando Abruzzese Italian Style Meatballs, which are incredibly easy to prepare, convenient and have an amazing flavor. I simply placed them in the oven to bake according to their package instructions, and while they were baking I gathered all the ingredients I needed to make this dish and began to spiralize the butternut squash. Spiralizing a butternut squash using a hand spiralizer can be a bit tricky as the squash is very thick, so I recommend using a stand mixer attachment to get the job done if you have one. You can also often find spiralized vegetables in the produce section at your local grocery store.

Butternut Squash Meatball Stroganoff

After spiralizing the squash, I added it along with a little EVOO and minced garlic into a pan and sautéed the noodles over medium heat for about 10-12 minutes. It’s important to keep in mind that butternut squash noodles do not take on the exact same texture as traditional noodles, so expect them to have a bit of crispness to them. I love this difference, as it really gives this dish an element of freshness that it so satisfying!

Butternut Squash Meatball Stroganoff

While the butternut squash noodles were sautéing away, I added the butter and onion to another pan and cooked over medium-high heat for about 5 minutes, followed by the mushroom, salt and pepper. I cooked the mushrooms down for about 8-10 more minutes, or until the mushroom released their juices and the juices cooked off. Next, I added the flour and thyme to the mushroom mixture and stirred until all flour was moistened. Reducing the heat to a medium-low, I continued stirring the mixture, adding the beef broth a little at a time until a smooth gravy formed.

Next, add in the sour cream and stir it into the sauce, making sure it incorporates smoothly. Add in the meatballs and allow them to simmer in the sauce for several minutes before serving over butternut squash noodles. I sprinkled a little fresh parsley over mine for a finishing touch. Here’s a free printable copy of the recipe if you’d like to give it a try!

Print Recipe

Butternut Squash Meatball Stroganoff

Ingredients

  • 1 package Carando Abruzzese Italian Style Meatballs cooked according to package instructions
  • 4 cups butternut squash noodles Peeled, seeded and spiralized
  • 1 Tbsp olive oil
  • 1 tsp minced garlic
  • 1 Tbsp butter
  • 1 Tbsp olive oil
  • 1/2 small yellow onion chopped
  • 2 cups baby bella mushrooms sliced
  • 1/2 tsp salt
  • 1/4 tsp black pepper
  • 1/2 tsp dried thyme
  • 1 Tbsp all purpose flour
  • 1/2 cup sour cream
  • 1 cup beef broth
  • fresh parsley for garnish

Instructions

  • On a baking sheet, bake Carando Abruzzese Italian Style Meatballs according to package instructions
  • While meatballs are baking, peel the skin off of the butternut squash and cut the squash right at the point where it begins to bulb outward. Remove all seeds and discard. You'll use the long neck portion to spiralize.
  • Using a heavy duty spiralizer, carefully spiralize the butternut squash until you have about 4 cups worth
  • In a large pan, sautee butternut squash, olive oil and minced garlic together for 10-12 minutes, keeping a lid over the pan for most of the cook time
  • In a separate pan, add butter and chopped onion and cook over medium-high heat for about 5 minutes
  • Add in mushrooms, salt and pepper and continue to cook until juices have released from mushrooms and have cooked off, about 8-10 more minutes.
  • Reduce heat to medium-low heat and stir in flour and thyme until flour has coated the mushrooms and been thoroughly moistened by the oils in the pan
  • Next, add in beef broth a little at a time and stir until a smooth gravy forms
  • Add in the sour cream and stir it into the sauce, making sure it incorporates smoothly
  • Add in the meatballs and allow them to simmer in the sauce for several minutes before serving over butternut squash noodles.
  • Garnish with fresh parsley and serve immediately
  • Enjoy!

Notes

It's important to note that butternut squash noodles do not take on the same texture as traditional pasta. Butternut squash noodles will have a bit of a "snap" to them. After sautéeing them, check their texture to see if it is as a point that you prefer. If not, continue to cook for a few more minutes. 

Tried this recipe?

Tag me on Instagram: @SouthernMadeSimple or use the hashtag #SouthernMadeSimple and share your love of southern cuisine!

Butternut Squash Meatball Stroganoff

My husband and I planted butternut squash in our garden for the first time this year. Even though it is a winter squash, we had a small summer harvest and are hoping for a much larger winter harvest. I have been utilizing butternut squash in numerous recipes and have thoroughly enjoyed finding new ways to add a twist on classic dishes, such as this Butternut Squash Meatball Stroganoff. Using the butternut squash noodles in place of traditional noodles is a healthier alternative, and pairing them with fresh Carando Meatballs really made this dish feel sophisticated. Anything goes with Carando!

Butternut Squash Meatball Stroganoff

During my previous grocery shopping trip, I also picked up a package of Carando Sicilian Italian Style Meatballs, which I’ll soon be incorporating into a tomato based pasta dish with, you guessed it, butternut squash noodles! Italian-style dishes speak right to my heart, and I love that Carando meatballs make achieving those authentic Italian flavors so simple!

Butternut Squash Meatball Stroganoff

Have you ever recreated a classic or favorite dish by giving it an unconventional twist? No matter how you prepare it, Carando Meatballs are the perfect addition to help you create an authentic Italian-style meal in less than 30 minutes. Even though the butternut squash noodles were a shining star in this Butternut Squash Meatball Stroganoff recipe, the Carando Abruzzese Italian Style meatballs came through as the real MVP, and I’ll always keep a package on hand when I’m ready to sink my teeth into those robust Italian-style flavors!

Filed Under: Casseroles & Comfort Foods, Home Cookin' Tagged With: Butternut Squash Meatball Stroganoff, Butternut Squash noodles, Butternut Squash stroganoff, Carando Meatballs

Instant Pot Boiled Peanuts

September 15, 2020 by Laura Tucker Leave a Comment

These Instant Pot Boiled Peanuts are a certified southern delicacy, and the cook time is cut in half thanks to pressurized cooking! Go ahead and crack a few open – I bet you can’t eat just one!

Instant Pot Boiled Peanuts

I believe in the root of my soul that there is no southern delicacy finer than fresh boiled peanuts. There may be some that would challenge me on that notion, but they are entitled to their wrong opinion. There’s just something about seeing a hand painted sign on the side of the road that says “Fresh Boiled P-Nuts” that sparks a knee-jerk reaction to pull over right away and get a sack full. It’s like it’s just embedded in our DNA or something.

My grandfather was a peanut farmer in the Wiregrass area of Alabama, also known by many as The Peanut Capital of the World. Growing up in the southeastern corner of Alabama, peanuts were part of our culture. I remember many long days and nights as a child picking peanuts off of their vine while gathered around a truck bed packed to the brim, and I remember my parents getting out a huge stock pot and boiling the peanuts for hours, just so we could enjoy a batch of boiled peanuts. Those were some good memories.

Instant Pot Boiled Peanuts

This past weekend we made a visit to Enterprise, AL where I grew up to visit my mother. Her brother has been farming peanuts for what seems like forever, and we were all thrilled when he pulled into her driveway with a truck bed full for us to pick and bring back home with us. Once I got home, I poured my sack of green peanuts into my sink and washed all of the Alabama clay off of them to prep them to boil. Instead of reaching for my large stock pot, though, I reached for my Instant Pot to get the job done a little quicker.

Instant Pot Boiled Peanuts
Print Recipe Pin Recipe

Instant Pot Boiled Peanuts

Equipment

  • Instant pot or pressure cooker

Ingredients

  • 2 lbs fresh green peanuts
  • 1/2 cup iodized salt
  • 10 cups water

Instructions

  • Thoroughly wash and rinse any dirt and debris off of peanuts
  • Add 2 lbs of peanuts to instant pot and cover with water
  • Add salt and stir using a large wooden or slotted spoon
  • Close lid and seal properly
  • Cook on high pressure for 60 minutes
  • Allow pressure to release naturally
  • Remove lid and allow peanuts to sit in their salty water for an additional hour
  • Serve and enjoy

Notes

Please note that this recipe uses green peanuts and not dried or raw peanuts. If using raw peanuts, soak the peanuts for 30 minutes prior to cooking and increase cook time by 25-30 minutes.

Tried this recipe?

Tag me on Instagram: @SouthernMadeSimple or use the hashtag #SouthernMadeSimple and share your love of southern cuisine!

After washing and rinsing the peanuts, I measured out 2 lbs worth and placed them inside my instant pot. I added 10 cups of water to cover my peanuts – but make sure you check your pot to make sure you’re not going past the recommended fill line. I then added in the salt and gave it a good stir. I set the the timer for 60 minutes on high pressure, then let the pressure naturally release after the timer went off. Overall, this equates to about 2 hours worth of cook time when you count the time it takes for the pot to come to pressure and to release pressure.

But we’re not quite done just yet. If you’re ready to dig into the boiled peanuts at this point, by all means go ahead. They’ll be delicious. However, my personal preference is to let them sit in the salty water for at least another hour. This really makes a big difference in the saltiness in my opinion, so taste test first before deciding to let them soak any longer. The key to that perfectly salty peanut flavor is in the soaking!

What’s the difference in green peanuts and raw peanuts?

I remember being so confused by the idea of “green” peanuts as a child. Really, they’re not green at all. This term simply means that they’ve been harvested straight from the ground and still retain a lot of their moisture, making a superior boiled peanut in my opinion. The term “raw peanuts” means that they’ve been sitting out for several days after harvest and have had more time to dry out a bit. Raw peanuts are 100% fine to boil, you’ll just have to soak them for a bit and increase their cook time a smidge.

Instant Pot Boiled Peanuts

My recipe for Instant Pot Boiled Peanuts is pretty simple – just water and salt is all you need. If you feel up to it, you can experiment with peanut flavors by adding in a little creole or hot sauce into the pot to create “Cajun” boiled peanuts. I typically add about 1/8 cup creole seasoning to mine to get that scrumptious spicy Cajun flavor!

If you’re looking for some more peanut goodness, I’ve got you covered! You’ll LOVE these peanut recipes found right here on Southern Made Simple!

No Bake Peanut Butter Pie | Peanut Butter Fudge | Peanut Butter Rice Krispie Treats | Peanut Butter Corn Flake Candy

Filed Under: Appetizers, Home Cookin' Tagged With: alabama boiled peanuts, boiled peanuts, green boiled peanuts, How to make boiled peanuts, Instant pot boiled peanuts, pressure cooker boiled peanuts, southern boiled peanuts

Double Chocolate Peanut Butter Rice Krispie Treats

September 10, 2020 by Laura Tucker Leave a Comment

These Double Chocolate Peanut Butter Rice Krispie Treats so hauntingly good, you’ll snap, crackle and pop for more! 

Double Chocolate Peanut Butter Rice Krispie Treats

A few weeks ago I shared a recipe for White Chocolate Peanut Butter Rice Krispie Treats, and ever since then I’ve had this slight obsession with finding more ways to capture those flavors and textures in other treats. Peanut butter and chocolate go together better than just about anything in this world, and adding in the light crispy and crunchy flakes from rice cereal creates this irresistible concoction that good right down to the bone.

Double Chocolate & Peanut Butter Rice Krispie Treats

These aren’t your typical back-of-the-box rice krispie treats, but don’t let that frighten you away from making them! You can certainly make these with original rice cereal, but I reached for the cocoa krispies to make these chocolaty treats instead. You’ll also need half of a package of chocolate almond bark, a cup of peanut butter, a cup of Reese’s Pieces and miniature marshmallows.
Double Chocolate & Peanut Butter Rice Krispie Treats

Using a double boiler (I called it my cauldron when making Halloween treats) 😉 melt down 1/2 of a package of chocolate almond bark. Add in the cup of peanut butter and stir until it’s perfectly creamy and smooth. Add in cereal, marshmallows and candy in a large bowl. Pour the melted chocolate over the cereal and stir until everything is well coated.

Pour into a well greased brownie pan or 8×8 casserole dish. Pro tip: Spray your hand or the back of a spoon with nonstick cooking spray so you can press the mixture down evenly into the pan without making a total mess.

Here’s a free printable copy of the recipe if you’d like to give it a try!

Double Chocolate & Peanut Butter Rice Krispie Treats
Print Recipe Pin Recipe

Double Chocolate & Peanut Butter Rice Krispie Treats

Ingredients

  • 4 1/2 cups coco rice krispies cereal
  • 1 lb chocolate almond bark (most packages of almond bark contain 2 lbs, so just break 1 package in half)
  • 1 cup peanut butter
  • 2 cups miniature marshmallows
  • 1 cup Reese's pieces

Instructions

  • In a double boiler, melt chocolate almond bark and stir continuously until smooth
  • Add in peanut butter and stir until well combined
  • In a large bowl, combine cereal, marshmallows and Reese's Pieces
  • Pour melted chocolate and peanut butter over cereal mixture and stir until well combined
  • Spray a brownie pan or 8X8 baking dish thoroughly with nonstick cooking spray
  • Pour mixture into pan and press into all corners using your hand or a well greased spoon to make sure mixture spreads as evenly as possible
  • While mixture is still wet, add a few more candy pieces and cereal for garnish if desired
  • Allow to sit on counter until mixture firms up enough to cut - at least 2 hours
  • Cut into squares and enjoy!

Tried this recipe?

Tag me on Instagram: @SouthernMadeSimple or use the hashtag #SouthernMadeSimple and share your love of southern cuisine!

Also, if you’re looking for a fool-proof way to get perfect and evenly cut bars, use a brownie pan like this one! I own this same one, and it’s a workhorse in my kitchen. 

Once the treats have dried and set, just slice and serve!  These Double Chocolate Peanut Butter Rice Krispie Treats go great with a tall glass of milk, and they’re perfect to serve for Halloween or fall celebrations!

Double Chocolate & Peanut Butter Rice Krispie Treats

Looking for more hauntingly fun Halloween treats? I’ve got it all right here on Southern Made Simple!

The Ultimate Halloween Charcuterie Board | Sweet & Salty Halloween Cookies | Haunted Halloween Pancakes | Halloween Deep Dish Skillet Cookie | Mummy Treats | Halloween Sugar Wafers | Freaky Frankenstein Oreo Pops

Filed Under: Desserts, Home Cookin' Tagged With: Chocolate rice krispie treats, Halloween Rice Krispie Treats, Peanut Butter and Chocolate rice krispie treats, Rice Krispie treats with reese's pieces

  • « Go to Previous Page
  • Go to page 1
  • Go to page 2
  • Go to page 3
  • Go to page 4
  • Go to page 5
  • Interim pages omitted …
  • Go to page 35
  • Go to Next Page »

Primary Sidebar

Connect

  • Facebook
  • Instagram
  • Pinterest
  • Twitter

Lookin’ for something in particular?

Welcome

ProfileImage
"Hi there! I'm Laura, and I'm a child of God, a wife, and a mother of two. My roots are planted deep in rural Alabama. Monograms, crafting and Southern cuisine - yes, these are a few of my favorite things! Join me as I grow my family in the beautiful South where the tea is sweet, the accents are sweeter, & someone's heart is always being blessed." [Read more...]

Subscribe via E-Mail

Footer

  • Facebook
  • Instagram
  • Pinterest
  • Twitter
Disclosure:
My site may contain affiliate links, which means that if you buy the products featured, I receive a small percentage of the sale price at no extra expense to you. Thanks for visiting Southern Made Simple!
By using this website you agree to our:

Privacy Policies

Copyright © 2023 · Foodie Pro Theme by Shay Bocks · Built on the Genesis Framework · Powered by WordPress