• Skip to primary navigation
  • Skip to main content
  • Skip to primary sidebar
  • Skip to footer

Southern Made Simple

Keeping things simple with a smidge of Southern charm

  • Home
  • About Me
    • Policies
    • Work With Me / Media Kit
  • Home Cookin’
    • Appetizers
    • Breakfast
    • Main Course Meals
    • Desserts
    • Recipe Index
  • My Favorite Things
    • DIY Projects
    • Farmhouse Finds
    • Product Reviews
    • VBS Resources
  • For the Kids
    • Cloth Diapering
    • Kids Fashion
    • Parenting and Lifestyle
  • Etsy Shop
  • Contact

Home Cookin'

Buffalo Pimento Cheese Dip Recipe

December 17, 2015 by Laura Tucker 2 Comments

Have you ever seen one of those dishes that you look at the ingredients and think they could never possibly work together? That was me with this dish.

We southerners tend to really love Pimento Cheese, and we like the kick of buffalo sauce every now and then (mostly on our chicken), but we like those things separate. Don’t go messin’ up a good thing of pimento cheese, now!

Well….I’m sorry. Actually, I’m not sorry, cuz this dip is DELICIOUS!

It’s a little more than delicious, y’all. This dip is downright sinful! While there’s nothing in it that’s good for you (try not to indulge TOO hard), every bit of it is good for the soul. At least, that’s what I’m telling myself. It’s comfort food at it’s finest. It’s basically a party in a bowl, and everyone will want an invite.

When I make this dish, it’s best that I make it for an event where several will partake. Otherwise, my husband and I will sit down and eat this thing in 3 servings. Not that that’s happened. It might have happened a few times, though. Just sayin’.

Buffalo Pimento Cheese Dip Recipe - This dip in sinful, y'all!

I love to add shredded or chopped chicken to this dip. Remember how I said us southerners like a touch of buffalo, but mostly on our chicken? Just stickin’ to my roots, here! Here’s what you’ll need to make this devilishly delicious dip:

Ingredients:

  • 1 8oz package of cream cheese (NOT fat free), softened
  • 1/4 cup light ranch dressing
  • 1/4 cup light blue cheese dressing
  • 1 cup shredded cheddar cheese + plus a handful for topping
  • 1/2 cup buffalo sauce
  • 1 4oz jar of pimentos, diced
  • 2 cups cooked/shredded chicken (optional, but DO IT!)

Directions:

  1. Preheat oven to 350 F.
  2. In a large bowl, combine all ingredients. Blend well.
  3. Top with additional cheese if desired.
  4. Pour ingredients into a casserole dish (8×11 or larger) and bake uncovered for 20-25 minutes.
  5. Serve with tortilla chips or your favorite crackers. I love Ritz Crackers with this!

If you give this Buffalo Pimento Cheese Dip recipe a try, I’d love to hear how you like it! I also won’t judge if you and your significant other or friends sat down and devour the whole dish. Been there! 😉

Filed Under: Appetizers, Home Cookin' Tagged With: buffalo, dip recipe, pimento cheese, recipes

Grinchy-Green Christmas Fluff

December 7, 2015 by Laura Tucker 5 Comments

You’re a SWEET One, Mr. Grinch! Grinchy-Green Christmas Fluff

You're a SWEET One, Mr. Grinch! {Grinchy-Green Christmas Fluff Recipe}…

Read More »

Filed Under: Desserts, Home Cookin' Tagged With: Christmas, dessert, recipe, The Grinch

3 Delicious DIY Gifts Using Peppermint Essential Oil

November 27, 2015 by Laura Tucker 2 Comments

The holidays are among us!

Have you been as busy as I have trying to figure out what to get everyone on your shopping list this year? Sometimes gift shopping in our house can get crazy if we don’t stay on top of our game. My list currently has 22 people on it (and I feel like I’m leaving someone out! Eeek!). I try not to let the pressure of gift buying get to me. After all, we’re supposed to enjoy this time of year!

If you’re stressing about what to get some of the people on your list, don’t empty out your pocket book! Share the holiday joy by filling their tummies with a few yummy treats instead!

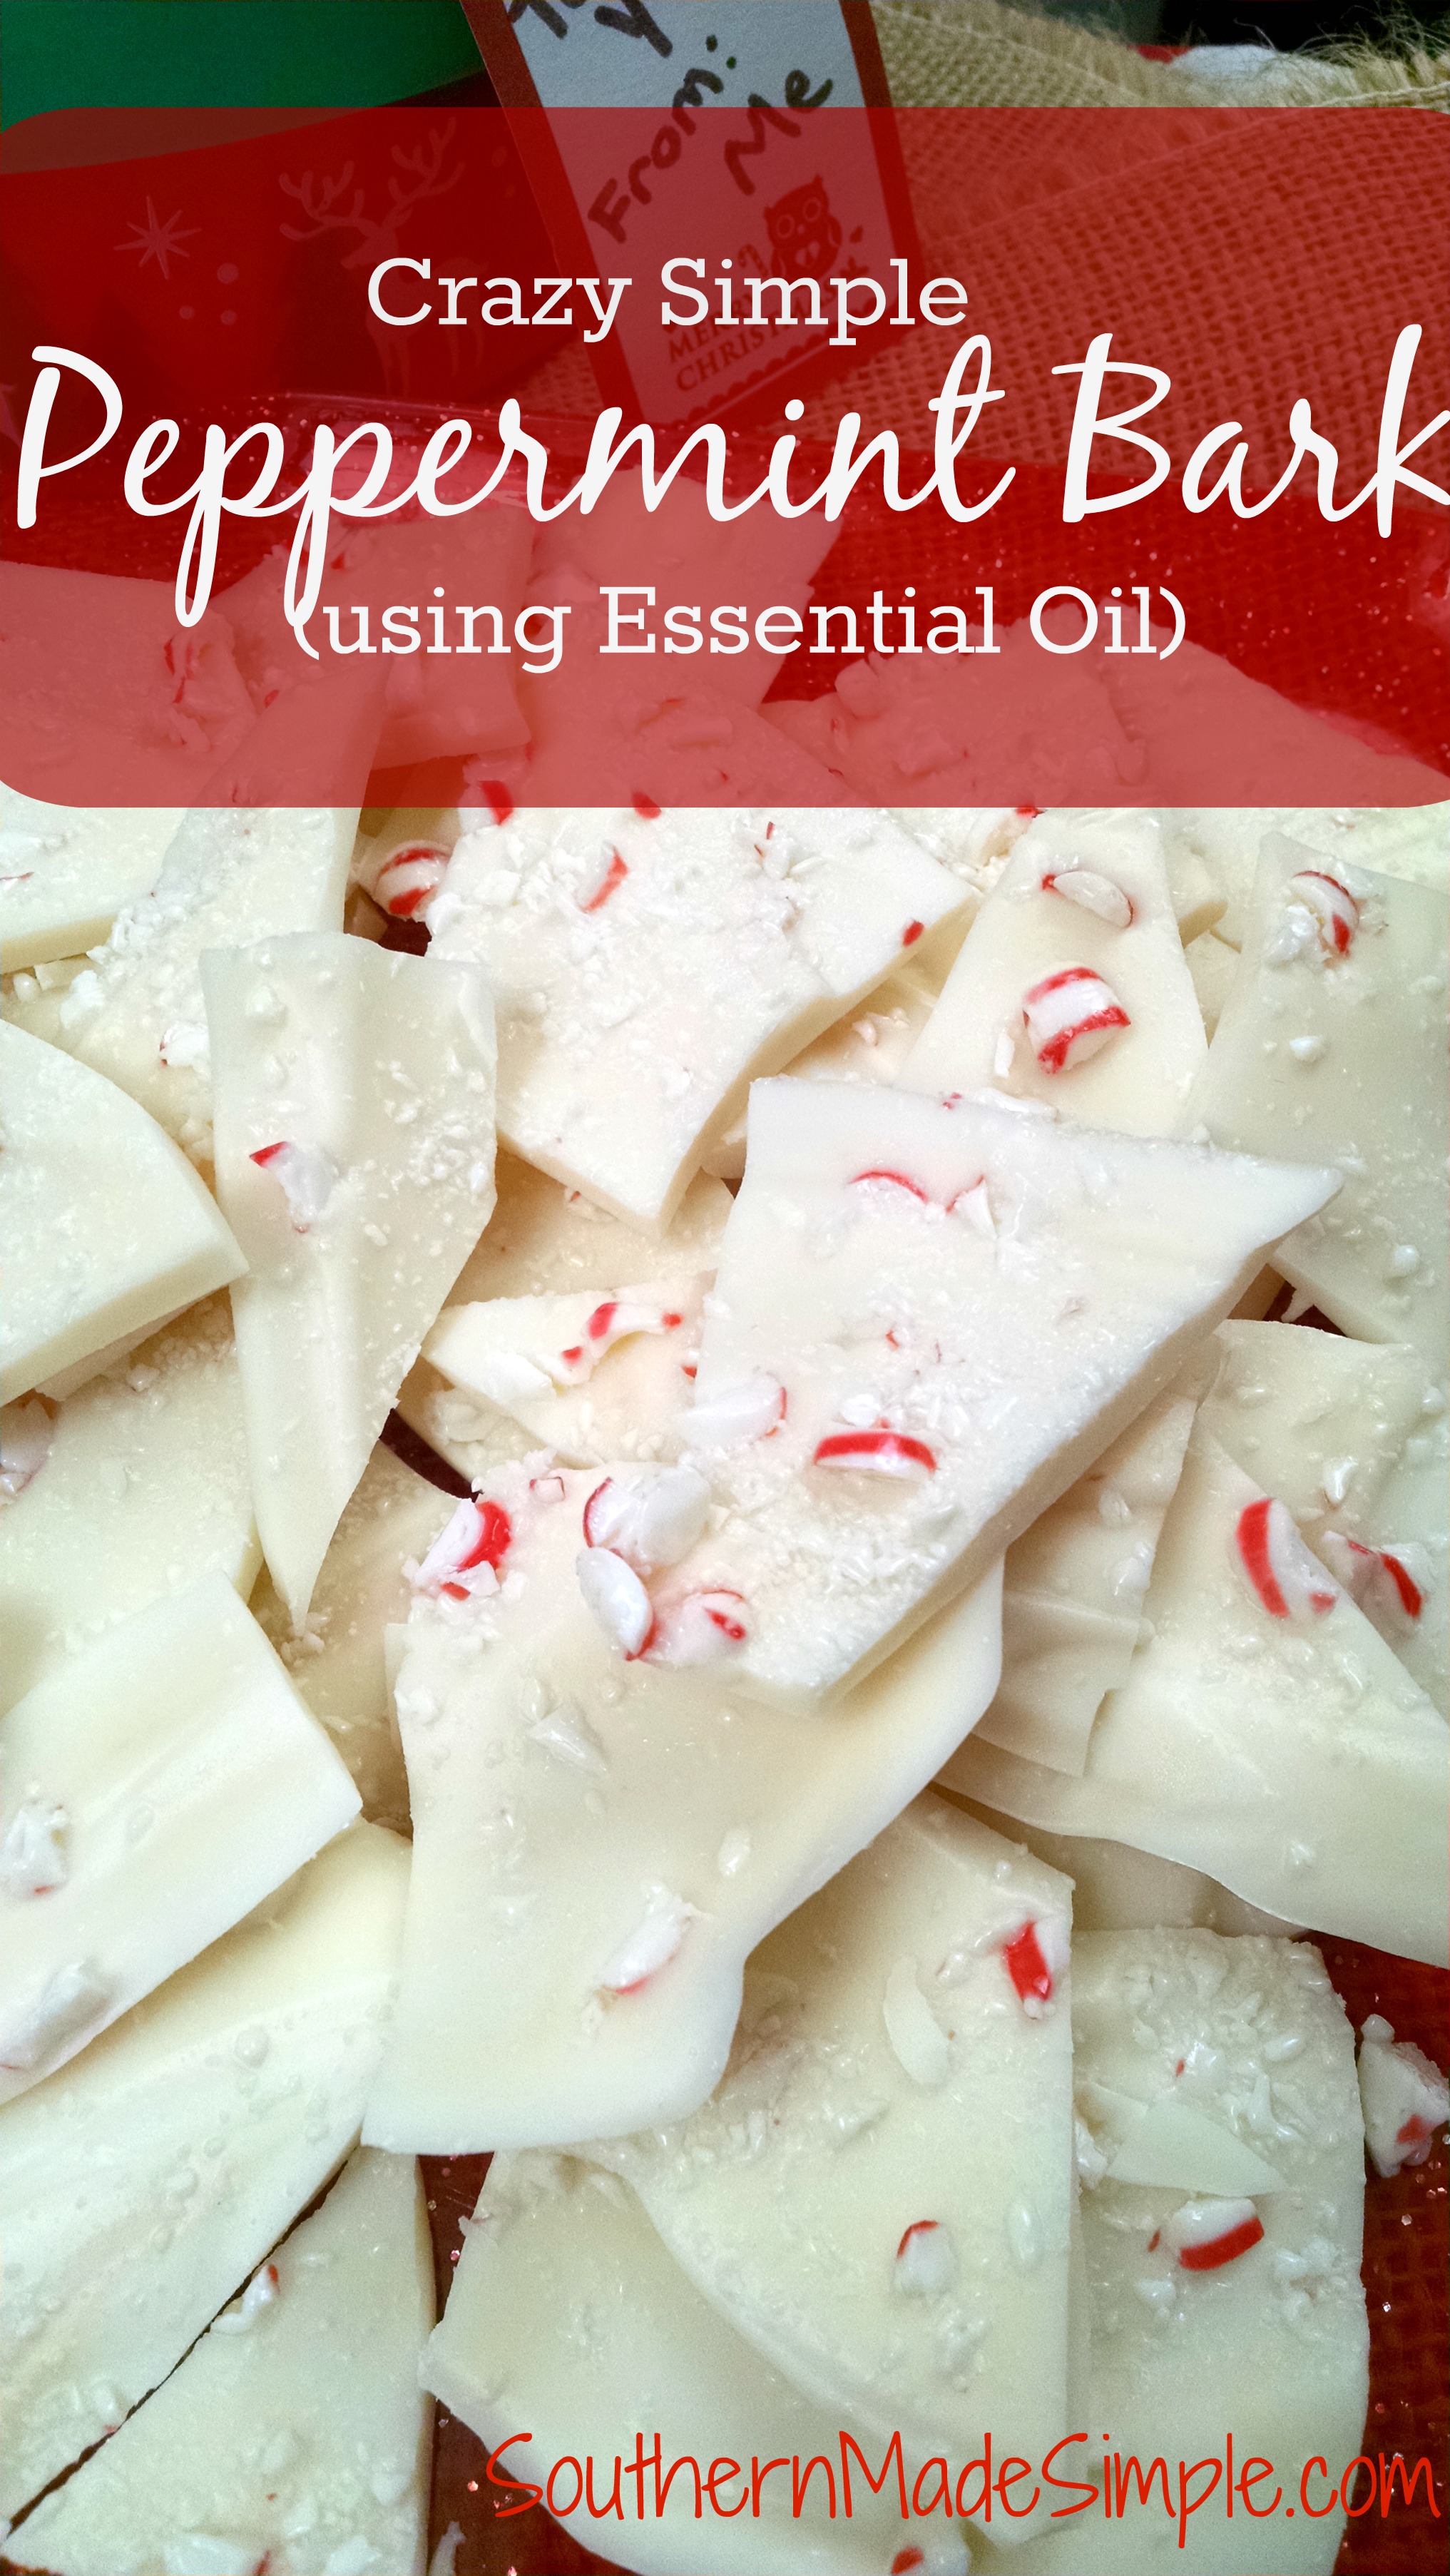
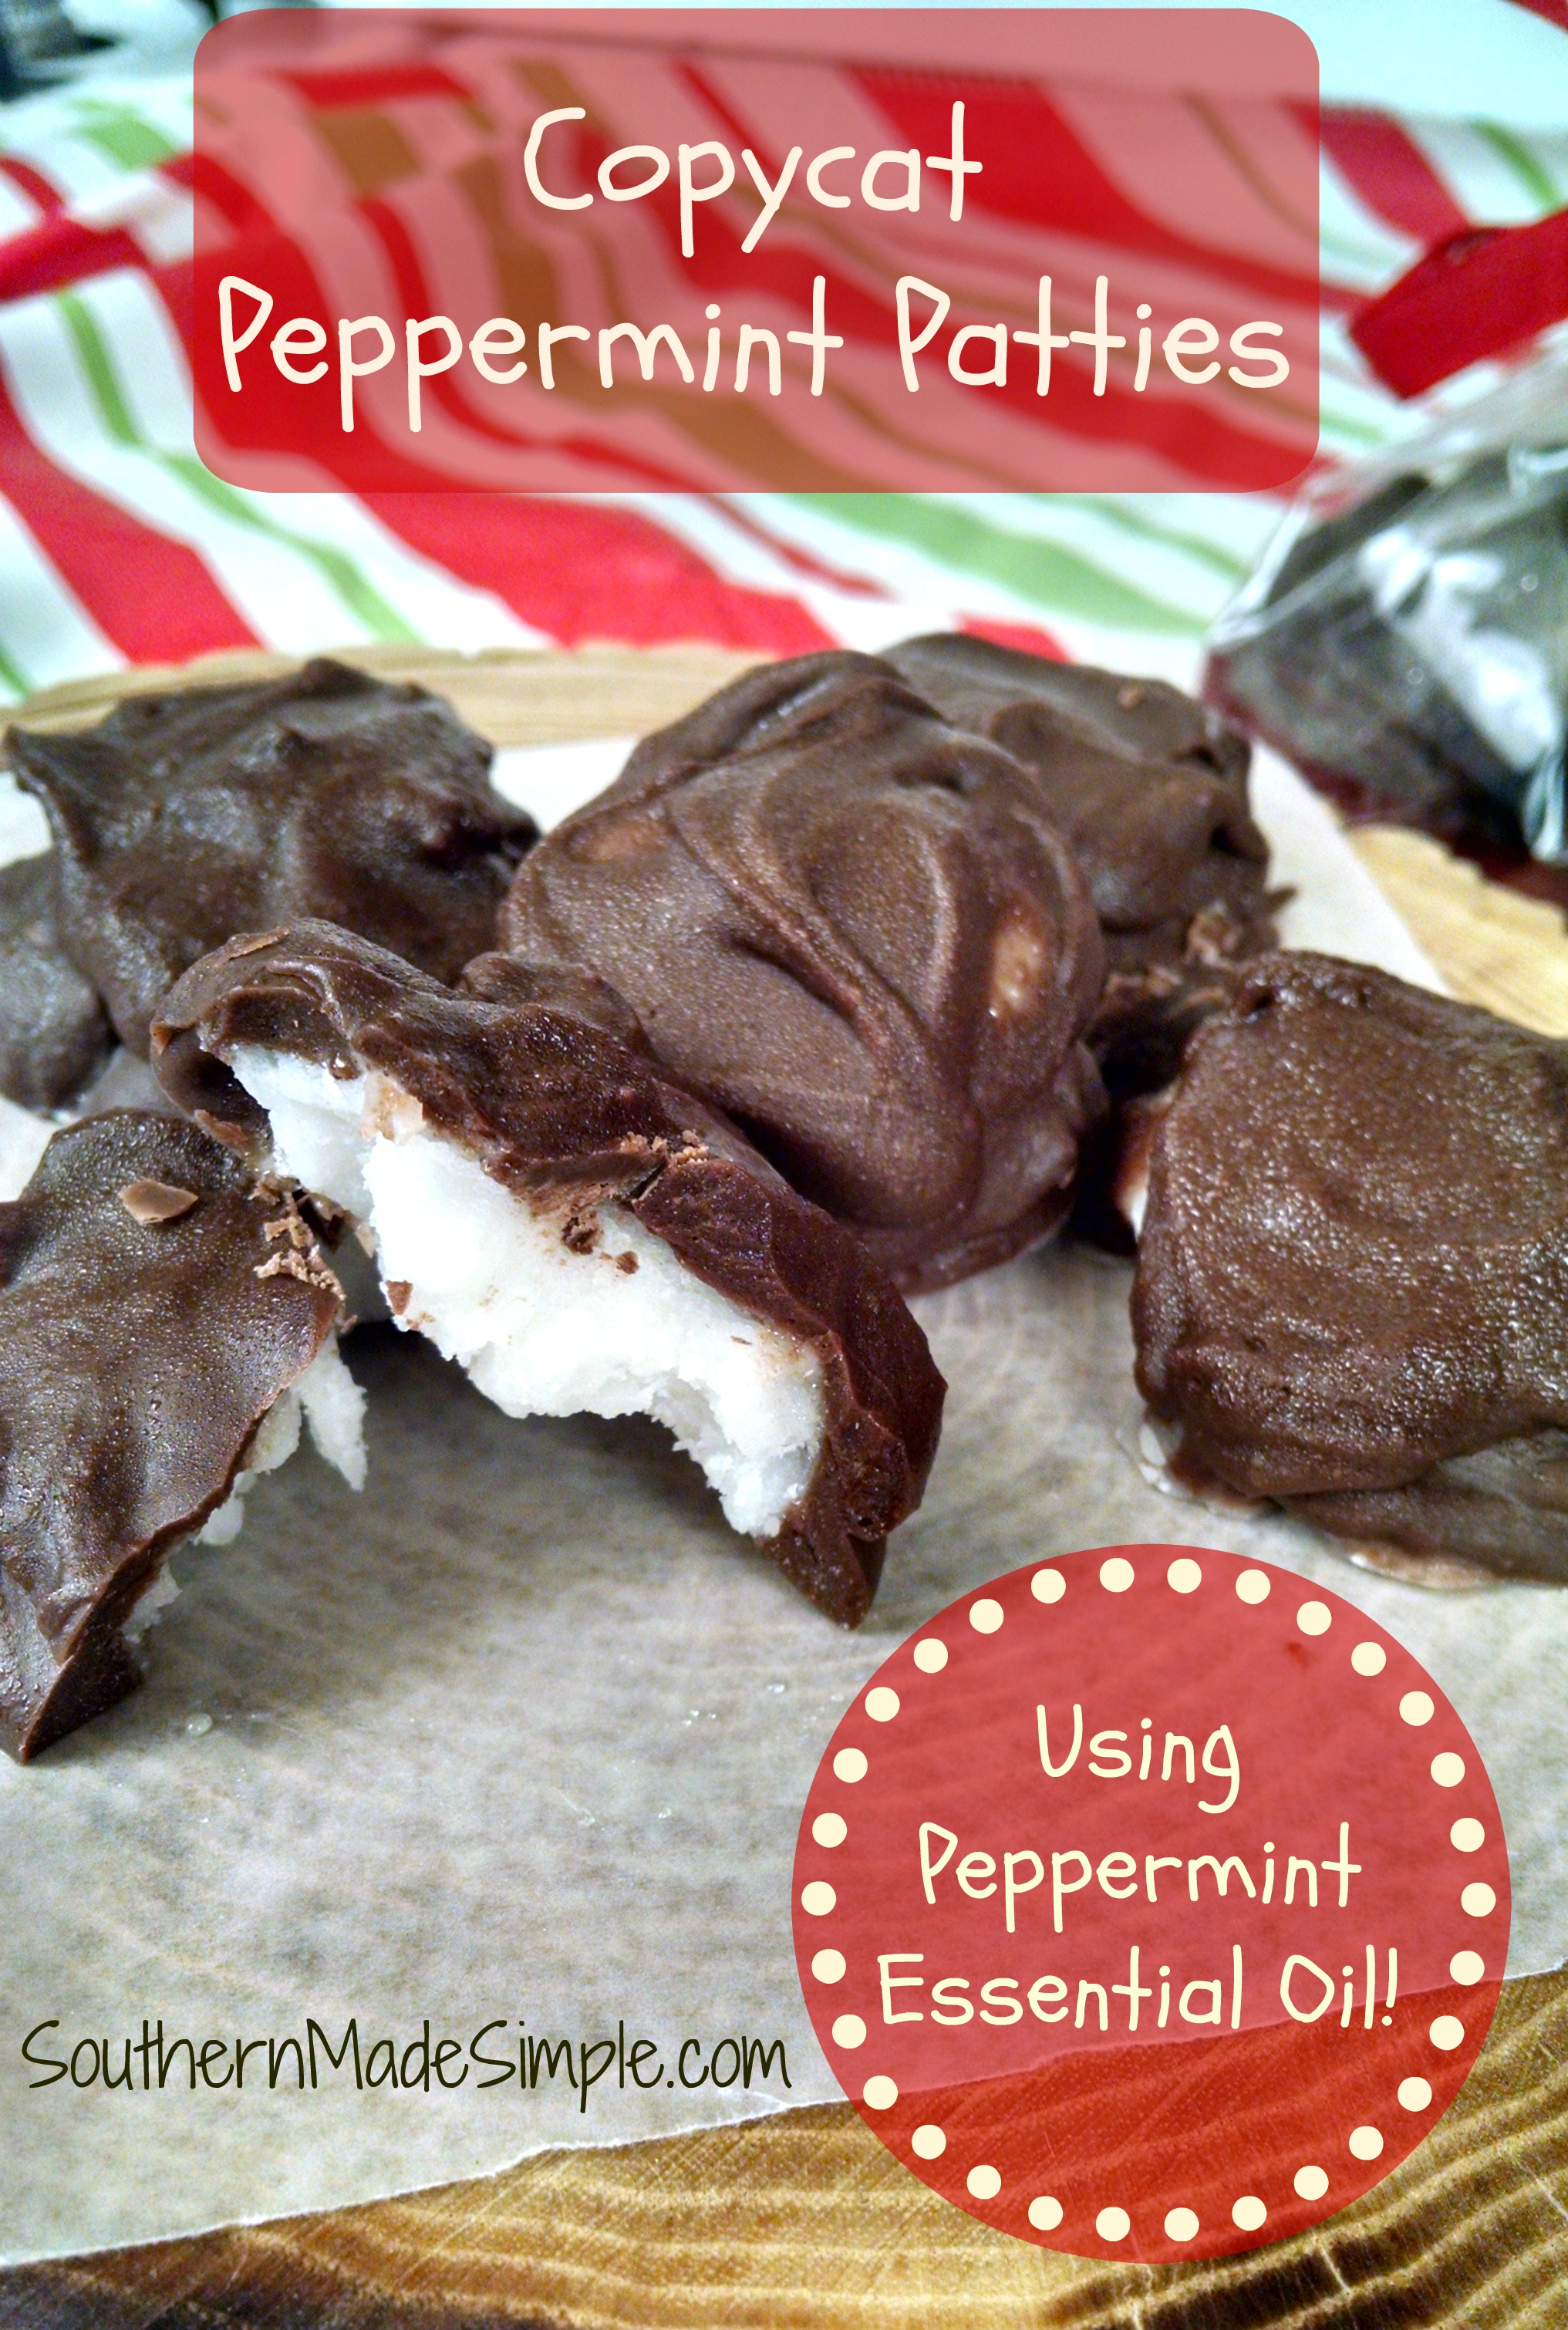
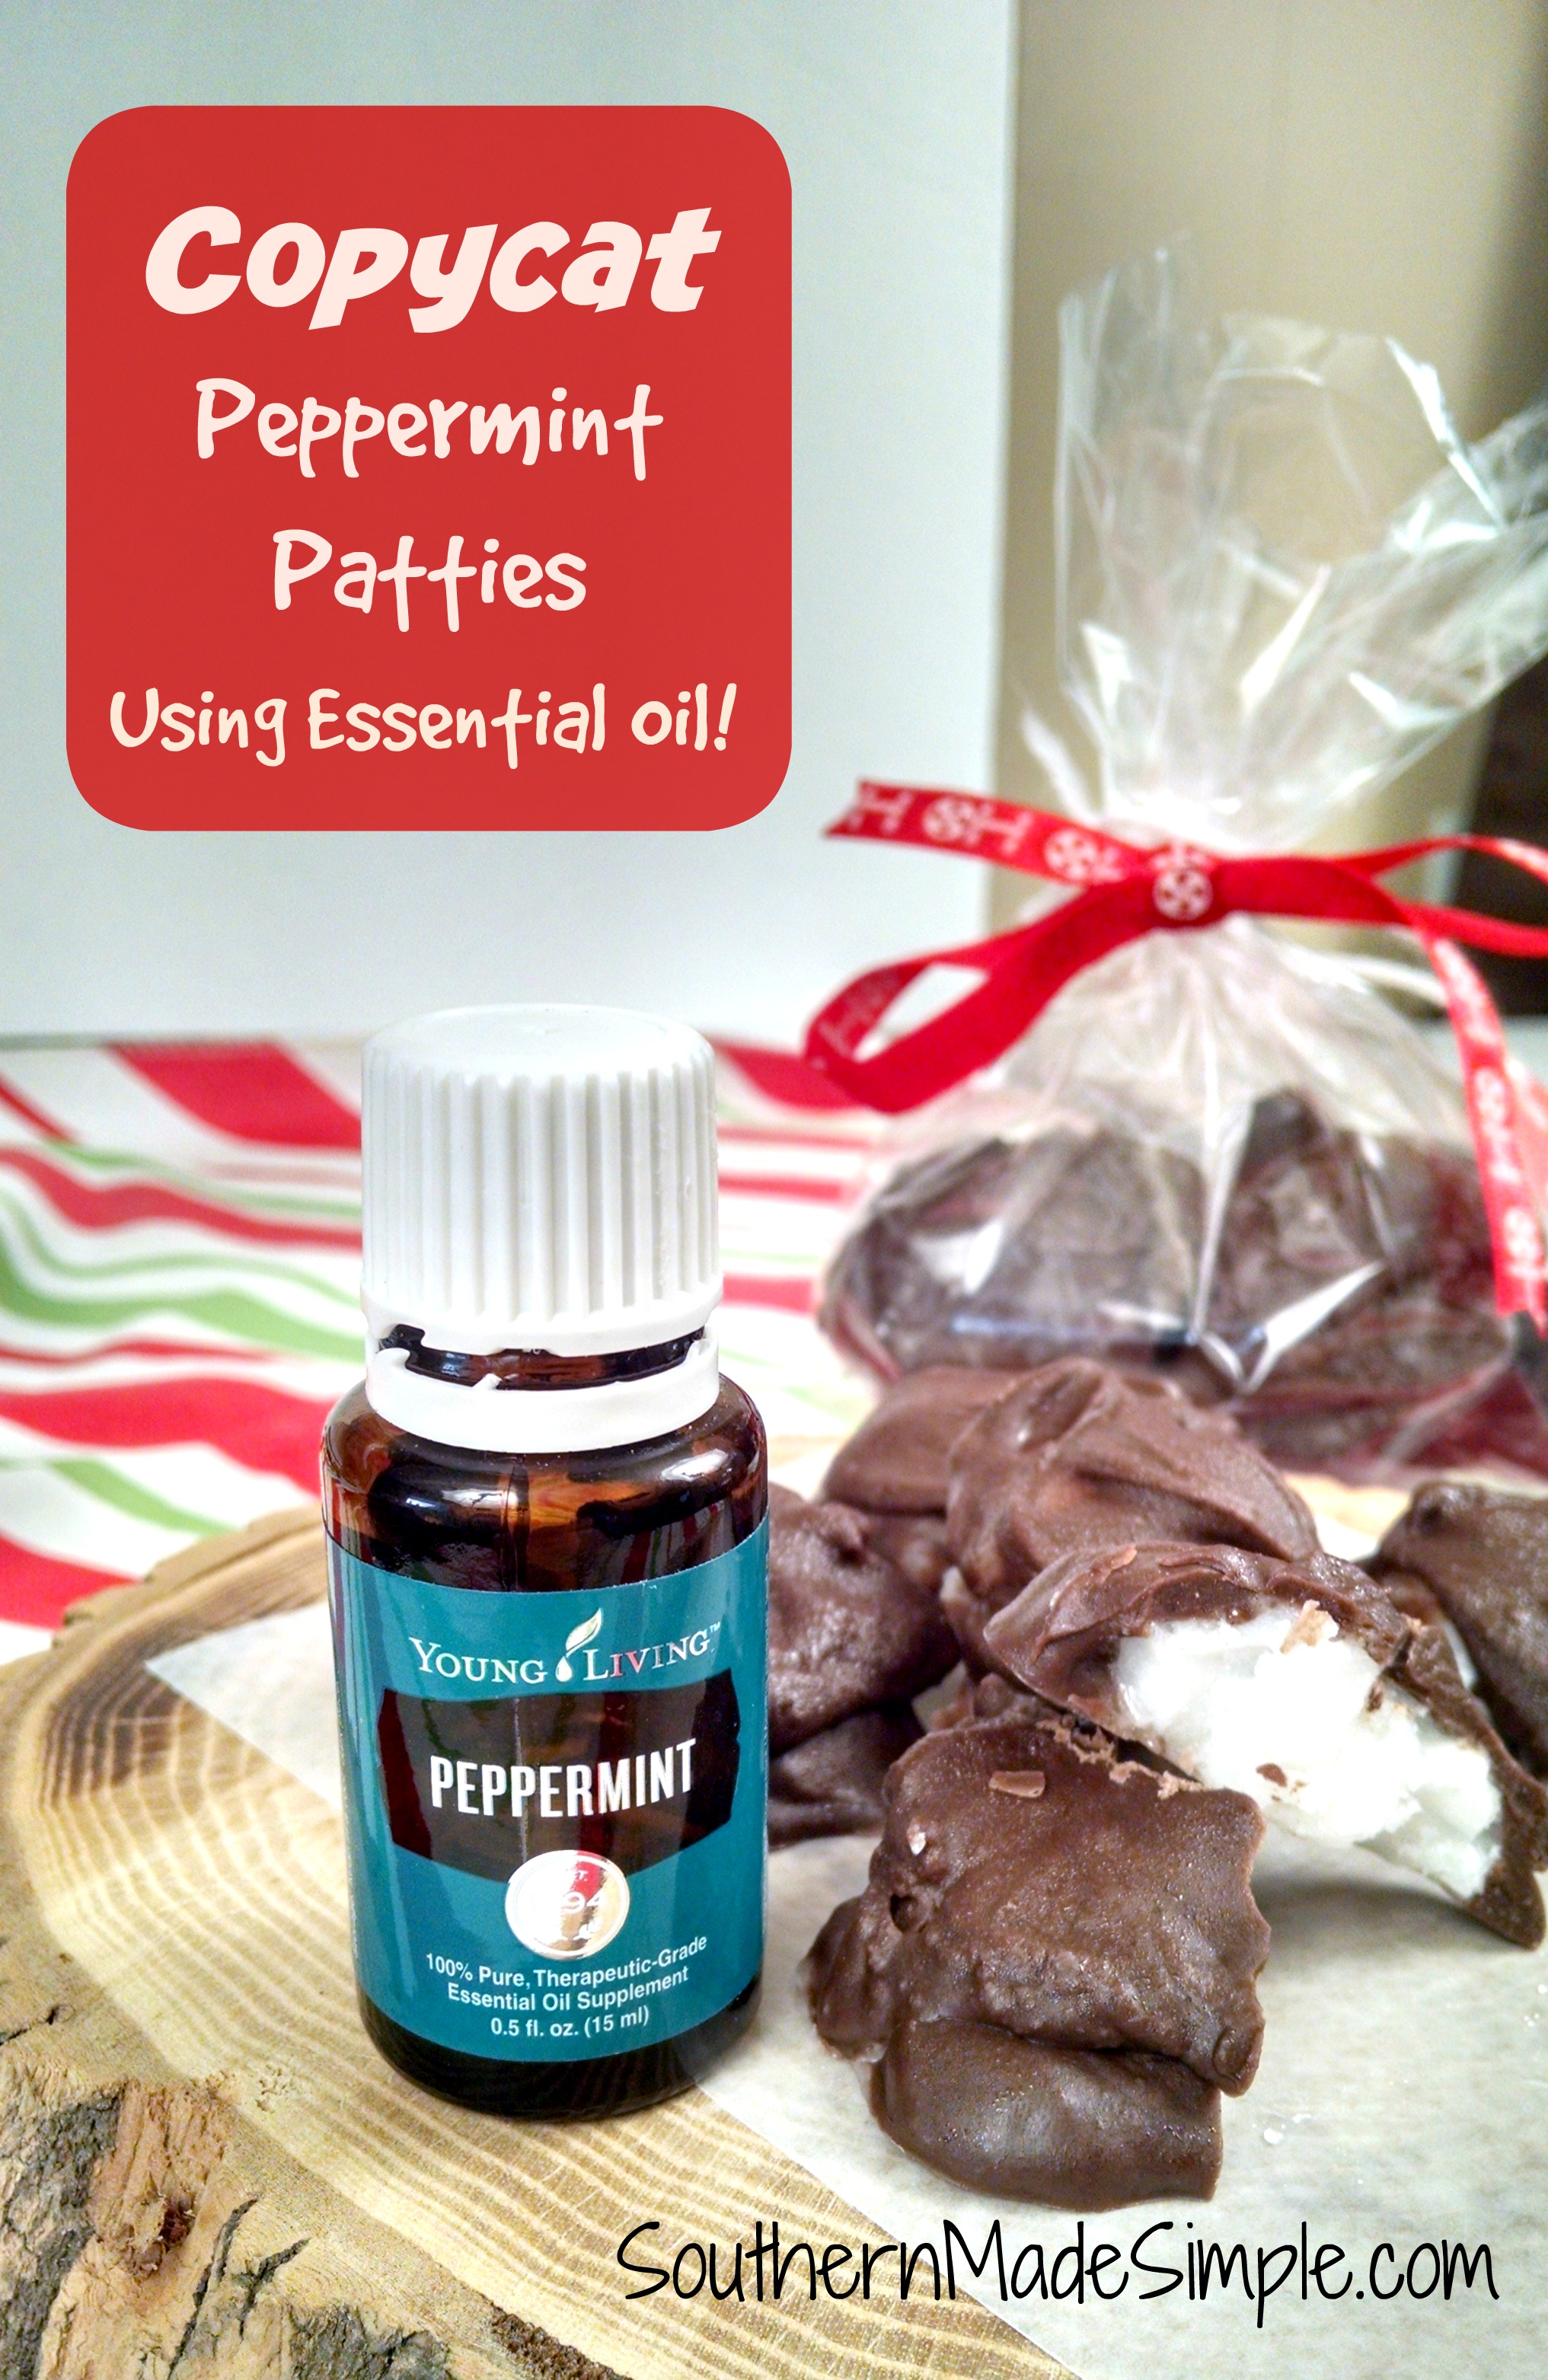
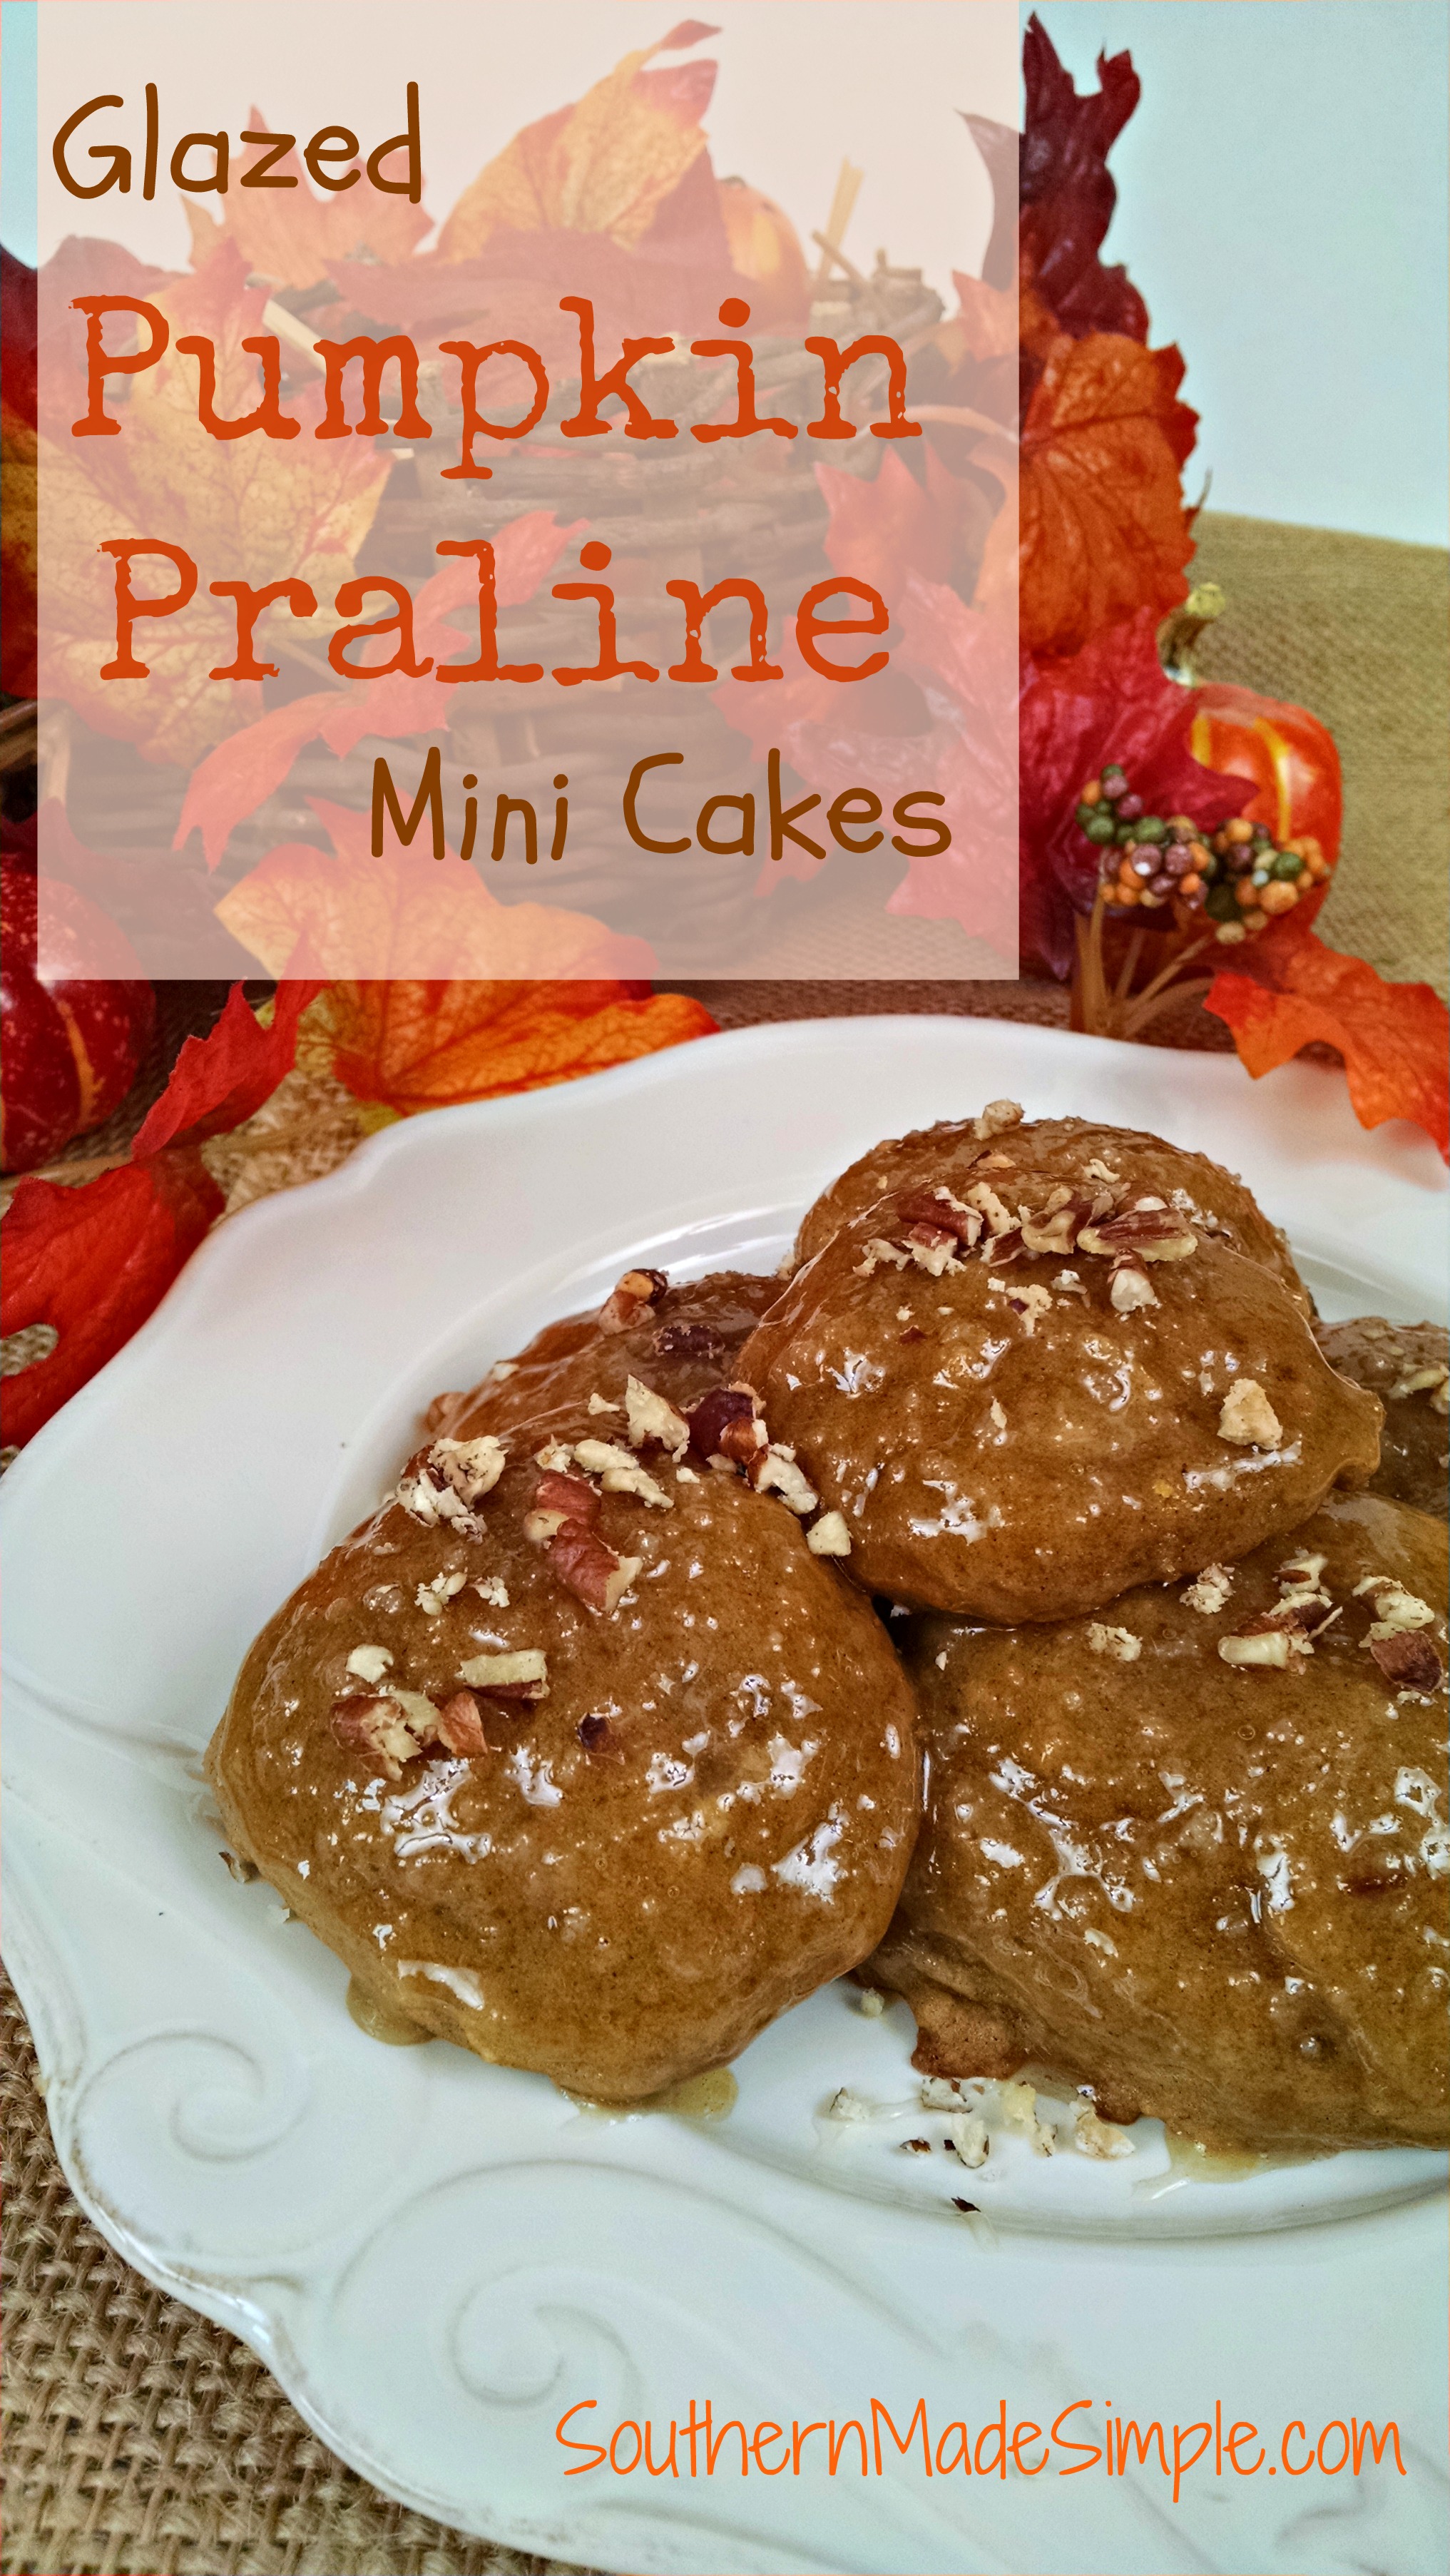
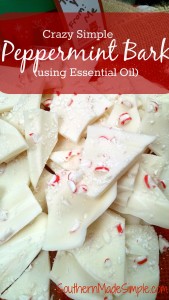
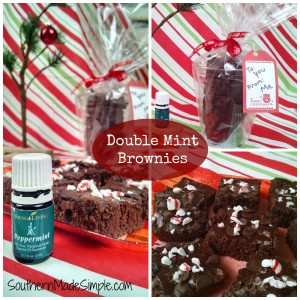
I’ve brought together 3 simple and delicious treats that would make a wonderful gift for anybody on your list! I’ve used Young Living Peppermint Essential Oil in all of my recipes, but you can substitute the oil for peppermint extract if you’d like. I’ll even share a few ideas on how to wrap them up. 🙂

If you’re interested in learning more about essential oils, I’ll include a link at the very bottom of this post that will direct you to a fabulous site with lots of helpful information!3 Delicious DIY gift ideas using peppermint essential oil

  1. Crazy Simple Peppermint Bark {Using Peppermint Essential Oil}

Easy Peppermint Bark Recipe using Peppermint Essential Oil

  1. Copycat Peppermint Patties {Using Peppermint Essential Oil}

Copycat Peppermint Patty Recipe using Peppermint Essential Oil

  1. Double Mint Brownies {Using Peppermint Essential Oil}

Double Mint Brownie Recipe using Young Living Peppermint Essential Oil

I hope you find the perfect to give your friends and family members this year, and I hope these 3 delicious DIY gifts using peppermint essential oil come in handy! If you decide to try out one of these recipes, I’d love to hear how it turned out!

Interested in learning more about essential oils? Check out what my sister has to say about them on her blog! She’s put together some really great and helpful information to help you out. You can read more here.

Filed Under: DIY Projects, Home Cookin' Tagged With: DIY, DIY gift, gift ideas, holiday gift, peppermint, peppermint essential oil

Pumpkin Layered Cheesecake Recipe

November 23, 2015 by Laura Tucker Leave a Comment

Cheesecake.

It’s a beautiful thing, y’all. When I count my blessings, I count cheesecake twice. It’s basically the 8th wonder of the world if we want to get real here. At least, in my mind it is. 😉

You’d THINK a girl like me who loves cheesecake more than most would’ve been to The Cheesecake Factory a time or two. But nope! I really haven’t. Sadly, the closest I’ve gotten to The Cheesecake Factory is an episode of The Big Bang Theory. Weep not for me, my cheesecake lovin’ friends. I will go forth into the golden gates of cheesecake heaven one glorious day, and I will indulge. Hard.

In the mean time, I’ll just make my own! Now, I don’t know that this could hold a candle anywhere near to what The Cheesecake Factory cranks out, but this pumpkin layered cheesecake recipe is pretty ding dong good if I do say so myself! Right on time for Thanksgiving, too! 🙂

Pumpkin Layered Cheesecake Recipe - Perfect for a Thanksgiving dessert!

You may have seen me share my love of all things pumpkin before. It’s something I just can’t keep a secret! I recently shared a delicious recipe for Glazed Pumpkin Praline Mini Cakes, which would also be an AH-MAZING addition to the Thanksgiving dessert table. Just sayin’.

Right now, though, I’m all about this cheesecake. It’s pretty simple to make, and it only calls for 1/2 cup of pumpkin puree (which means you can totally use the remaining pumpkin puree to make those mini cakes I just shared.) #Yourewelcome

Here’s what you’ll need for this dish:

Ingredients:

  • 2 packages cream cheese, softened
  • 1/2 cup sugar
  • 1/2 tsp vanilla extract
  • 2 eggs
  • 1/2 cup pumpkin puree
  • 1/2 tsp cinnamon
  • 1/4 tsp nutmeg
  • 1 9 inch graham cracker crust pie shell

Directions:

  1. Preheat oven to 350 F
  2. Using a mixer, beat together cream cheese, vanilla and sugar in a large bowl until smooth. Then add in eggs.
  3. Dip out 1 cup of cream cheese mixture and set aside.
  4. Try really hard not to lick the spoon.
  5. Pour remaining mixture into pie crust.
  6. Using your reserved cream cheese mixture, blend in pumpkin, cinnamon and nutmeg.
  7. Pour pumpkin mixture on top of cream cheese mixture in the pie crust.
  8. Bake for 35-40 minutes, or until the center of the pie is mostly set.
  9. Allow to cool completely, then refrigerate for 3 or more hours.
  10. Enjoy!
Are you a cheesecake lover, too? Maybe you’re crazy about pumpkin like I am? Do you have another fabulous cheesecake recipe you’d like to share? I’d LOVE to hear about it!

Filed Under: Desserts, Home Cookin' Tagged With: cheesecake, pumpkin, pumpkin puree, recipe, thanksgiving

Crazy Simple Peppermint Bark {Using Peppermint Essential Oil!}

November 16, 2015 by Laura Tucker 1 Comment


Let’s just say you’re looking for something sweet to make for a holiday party or to give as a gift this season, but maybe you’re facing a few challenges. Maybe you’re terrible at following a recipe. Maybe looking on Pinterest for something great to make stresses you out or makes you feel overwhelmed. Maybe you’re strapped for cash. Maybe you realized 5 minutes ago that you’re supposed to bring something to an event, and that event is in half an hour and it takes you 15 minutes to get there. I get it. I’ve been there.

Fret not, my friends. I have a simple, quick, inexpensive and yummy solution for you! You can thank me later. 😉

Easy Peppermint Bark Recipe using Peppermint Essential Oil

Peppermint bark is the perfect festive snack to satisfy a sweet tooth. It has just 3 ingredients, and it’s actually pretty fun to make! Here’s what you’ll need:

Ingredients:

  • 1 package white almond bark
  • a few peppermints of candy canes – crushed
  • 5-7 drops peppermint essential oil

Directions:

  1. Melt almond bark over the stove or in a crock pot, stirring frequently to avoid any scorching
  2. Line a large cookie sheet with wax paper
  3. Pour completely melted almond bark onto the cookie sheet
  4. Sprinkle crushed peppermint on top quickly before the chocolate dries
  5. Allow to cool. You can speed this up by placing it in the freezer for a few minutes
  6. Once it’s cooled, break the peppermint bark into bite size pieces

That’s it, y’all! It’s insanely easy to make, and it makes for a really sweet gift to give during the holidays. Just wrap it up in a holiday candy tin (You can frequently find them in a 3 pack for around $3), put a bow on it and you’re done!

If you would like to learn more about essential oils, I recommend checking out this post that my sister wrote. You can find it here: Getting Into Essential Oils as a Skeptic. It’s packed full of great into and tips on how to get started.


Filed Under: Desserts, Home Cookin' Tagged With: easy holiday dish, Essential oil, peppermint, peppermint bark, peppermint essential oil

Copycat Peppermint Patties

November 14, 2015 by Laura Tucker Leave a Comment

I’ve definitely been on a peppermint kick here lately. I’ve been having so much fun buying stocking stuffers and Christmas gifts for my 6 month old this week, and it’s just really put me in the holiday spirit! While I’m not ready to start decorating my house yet (that absolutely comes AFTER Thanksgiving in this house), smelling and using peppermint essential oil certainly makes me want to!

I recently posted a delicious recipe for double mint brownies using peppermint essential oil. I mentioned how it would be a great gift to package up and give to family members or friends for the holidays. I then started brainstorming some other ways that I could use peppermint oil in the kitchen. I wanted to think of some yummy treats that would also be great to share with others as a gift. Then I thought of these:

Say hello to my little friends!

Copycat Peppermint Patty Recipe using Peppermint Essential Oil

I was so excited to try my hand at making these. They’re pretty darn close to real peppermint patties as far as taste goes. They’re just missing that perfectly pressed/processed round shape that the real ones have. But who needs that anyway, right?! These are also a little bit healthier that the real deal, too. Here’s what you’ll need to make these:

Ingredients:

  • 1/2 cup refined coconut oil (It doesn’t have a coconutty taste)
  • 1/2 tsp vanilla
  • 3 or 4 tbs corn syrup (Honey also works great!)
  • 6-7 drops peppermint essential oil (You can also use 1 tsp peppermint extract instead of EO)
  • Chocolate almond bark or baking chips, melted

Copycat Peppermint Patty Recipe using Peppermint Essential Oil

Directions:

  1. Mix coconut oil, peppermint oil, corn syrup and vanilla together in a mixing bowl. The coconut oil will start to soften as you mix. (Tip: Before mixing, slightly melt the coconut oil in the microwave for a few seconds to ensure that you can stir it easily. Do not melt so much as to make it completely liquid.)
  2. Place the mixture in the freezer for 10 minutes to allow it to harden a bit.
  3. Line a baking sheet with wax paper.
  4. Once the filling has hardened in freezer, take it out and dip out spoonfuls of the filling onto the wax paper. If you’d like, press them into a flatter shape. Be careful though, because the coconut oil will melt very quickly if you use your hands to press them.
  5. Place back into the freezer for another 10 or so minutes.
  6. Melt chocolate
  7. Remove patties from freezer. Using a spoon, pour chocolate over each patty. *Note: You may find that the chocolate doesn’t stick right away because the coconut oil melts quickly. That’s OK. You’re going to repeat this process a second time, and it will stick much better the second time.
  8. Place back in freezer for another 10 minutes. Remove and pour chocolate over each patty once more. If you’d like, you can repeat the process a third time to cover the bottom with chocolate
  9. Place in freezer or refrigerator for a final time to allow to harden. Once you’ve done this, you’re all done! Enjoy!

While these can sit out, they are best stored in the refrigerator. Coconut oil can quickly melt if it is ever at a temperature slightly hotter than room temp.

If you’re making these to give as a little DIY gift, you can put them in a cute little Christmas tin or put in a cellophane bag and tie with a ribbon like I did! These are so yummy and just melt in your mouth. Anyone who loves chocolate and mint together would love these for sure!

If you would like to learn more about essential oils, I recommend checking out this post that my sister wrote. You can find it here: Getting Into Essential Oils as a Skeptic. It’s packed full of great into and tips on how to get started.

Filed Under: Desserts, Home Cookin' Tagged With: copycat peppermine patties, DIY, Essential oil, holiday candy, peppermint essential oil, Peppermint Patties, recipe

Double Mint Brownies using Peppermint Essential Oil

November 13, 2015 by Laura Tucker 2 Comments

Christmas is right around the corner, y’all! It’ll seriously be here before we know it. It always has a way of sneaking up on me! I’ve already been pulling out my Christmas gift list (and checking it twice) and making notes here and there of what I’d like to give my friends and family as gifts this year on the big day. It’s always fun to make sweets and package them up and give to others. It’s also fun to receive sweet treats (just in case you needed an idea of what to get me!) 😉

One of the first things I associate with the holidays is food – particularly sweet treats. I’ve always loved to be in the kitchen, but I especially love to be in the kitchen during this time of year. Once Thanksgiving has come and gone, I start putting away the pumpkin and break out the peppermint! I’ve always loved chocolate and peppermint together. My husband is not a fan, but that doesn’t stop me from digging in! 😉

One chocolatey and pepperminty dish that’s so easy to make is Double Mint Brownies. They’re so delicious, and they are perfect to wrap up to give as a little gift to someone on your Christmas list! I think instead of baking Santa cookies this year, we might be leaving him and his reindeer some of these beauties. Who knows, maybe he’ll leave us a little something extra special!

Double Mint Brownie Recipe using Young Living Peppermint Essential Oil

Double Mint Brownie Recipe using Young Living Peppermint Essential Oil

I have been using essential oils for over a year now. I’m always amazed at how many different uses each oil has! This time of year, I really love to use peppermint essential oil when baking. In this recipe, I use it in place of mint extract.

Note: If you would like to learn more about essential oils, my sister has a really informative post that may help you out! You can find it here.

Ingredients:

  • 1 1/4 cups all purpose flour
  • 1 tsp baking powder
  • 2 cups sugar
  • 3 eggs
  • 2/3 cup cocoa powder
  • 1 tsp salt
  • 1 tsp vanilla
  • 2 sticks butter, melted
  • candy cane or peppermints
  • semisweet morsels – optional
  • 5-6 drops peppermint essential oil. (*Note- If you don’t have or don’t want to use an essential oil, you can use 1 tsp mint extract. BE SURE to use the proper amount of essential oil if you decide to use it. It does not measure the same as using mint extract.)

Directions:

  1. Preheat oven to 350 F
  2. Combine dry ingredients in a bowl
  3. In a separate bowl, combine wet ingredients
  4. Combine wet and dry ingredients and pour into greased 9X13 pan
  5. Crush candy cane/peppermints in a ziploc bag using a meat mallet  or hammer
  6. Sprinkle a few crushed mints and a handful of semisweet morsels on top of batter
  7. Bake for 22-25 minutes
  8. Remove from oven and allow to cool. If desired, sprinkle additional crushed mints on top.
  9. Enjoy!

Just FYI – If you’re in a time/ingredient crunch, you can also accomplish this pepperminty awesomeness by buying a box of brownie mix and just adding the peppermint to it. I won’t judge!  Don’t you ever let anybody tell you that store bought isn’t fine. 🙂

To give these brownies as a gift, put them in a cute little holiday tin and put a bow on top! I actually stacked them and placed them in a clear plastic cup. I covered the cup with cellophane, tied it together with ribbon, and added a name tag. Easy as pie, y’all!

Have you ever cooked using essential oils before? Do you love chocolate + mint like I do? If you try this recipe for peppermint brownies using peppermint essential oil, I’d love to hear how it turned out!

Filed Under: Desserts, Home Cookin' Tagged With: brownies, chocolate, christmas dessert, dessert, Essential oil, mint, mint chocolate, peppermint brownie

Glazed Pumpkin Praline Mini Cakes

November 9, 2015 by Laura Tucker 3 Comments

I have a problem, y’all.

When Fall rolls around each year and I see that the grocery store has moved the pumpkin puree to the end cap or center aisle (hello impulse shoppers!), it’s like moths to the flame. Every time. No lie. There is no buying just one can. I’ll buy seven! There’s just something about this time of year that sends my mind in a tizzy. If you could hear the voices inside my head, they’d probably sound something like this:

Pumpkin Meme

I mean, I don’t mean to be THAT girl, but I cannot deny my love for pumpkin. There’s just so many things you can do with it. What’s not to love?!

I found this recipe scribbled down in a 3 ring binder in my recipe collection. I made it several years ago and actually forgot all about it! I did a little tweaking and turned it into something new that I am absolutely loving. These little cakes are so stinkin’ delicious. Make sure you have a tall glass of milk on hand, because you’re gonna want it after you have one of these bad boys!

These Pumpkin Praline mini cakes are SO delicious and perfect for a holiday treat!

Ingredients:

  • 2 sticks butter, room temp
  • 1 cup canned pumpkin (roughly half the can)
  • 1 egg
  • 1 tsp vanilla flavoring
  • 2 c all purpose flour
  • 1/2 c sugar
  • 1/2 c brown sugar
  • 1 tsp baking soda
  • 1 tsp baking powder
  • 2 tsp cinnamon
  • 1 tsp pumpkin pie spice
  • dash of salt

Glaze:

  • 3 tbs butter
  • 1/2 cup brown sugar
  • 1/4 c milk
  • 1 1/2 c powdered sugar
  • chopped pecans (No limit. Use however much you like!)

Directions:

  1. Preheat oven to 350 F
  2. In a large bowl, combine flour, baking powder & soda, cinnamon, pumpkin pie spice and salt
  3. In another bowl, cream butter, sugar and brown sugar together
  4. Blend egg, vanilla and pumpkin into butter/sugar mixture
  5. Mix flour mixture into the butter/sugar mixture
  6. On a greased cookie sheet, drop a tablespoonfuls of the batter spaced roughly 1-2 inches apart
  7. Bake for 10-11 minutes
  8. Remove the cookies and immediately transfer them to a wire rack to finish cooling completely
  9. Prepare glaze as follows:
    • Glaze: In a small saucepan, stir butter and sugar over medium heat and allow to bubble. Stirring constantly, cook for roughly 1 minute. The sauce will begin to thicken slightly. Pour milk into mixture and stir.
    • Beat in powdered sugar and continue to cook for another 2-3 minutes. The sauce should thicken considerably. You’re going to want to frost the cookies quickly, as this sauce will harden fast.
    • I personally dunked the cakes into the sauce, allowing only the top to be glazed (pictured below), but you can also brush the glaze on with a basting brush.
    • Pumpkin Praline Mini Cakes Recipe
    • While the glaze is still wet on the cakes, sprinkle with pecans. Using a spoon, drizzle a little more of the sauce over the pecans.
    • Enjoy!

What are some of your favorite fall sweet treats? I absolutely love cooking with pumpkin and am always looking for a new way to use it in the kitchen! If you try this recipe for glazed pumpkin praline mini cakes, I’d love to hear your thoughts on it!

Filed Under: Desserts, Home Cookin' Tagged With: dessert, fall dessert, praline, pumpkin, pumpkin cake, pumpkin spice, recipe

Turkey Pesto Sliders with Brown Sugar & Poppy Seed Glaze

November 3, 2015 by Laura Tucker 4 Comments

My family absolutely LOVES sliders. I mean, who doesn’t love a teeny little sandwich?? You really just can’t go wrong with them in my opinion. One of my favorite things about sandwiches in general is that you can go in any direction with them. Hot cheesy Mexican-inspired slider? Sure! Cold cut with Italian prosciutto? Don’t mind if I do! Smothered and covered in saucy deliciousness? Uh, HECK YES!! The possibilities are nearly endless. However you serve it, my family will probably love it.

Turkey Pesto Sliders with brown sugar + poppy seed glaze

This particular dish is our #1 pick when it comes to sliders. It’s sweet, savory, a tad bit sticky, and insanely delicious! They’re perfect for game days, tailgates, pot lucks and especially a random Tuesday night. Whatever the occasion, these are always a good call!

These delicious turkey pesto sliders make for a simple, yet savory dish perfect for any occasion!

These delicious turkey pesto sliders make for a simple, yet savory dish perfect for any occasion!

Ingredients:

  • 1 package of Kings Hawaiian sweet rolls
  • 1 package of your favorite sliced turkey
  • 1 package provolone cheese slices (you’ll probably only use half of the package)
  • Pesto sauce (you can make your own, or you can buy it in a jar)
  • 1 stick butter (+ 1 Tbs)
  • 1 sweet onion – sliced
  • 2 Tbs yellow mustard
  • 1/3 c brown sugar
  • 3 Tbs Worcestershire sauce
  • Poppy seeds

Directions:

  1. Saute sliced onions in 1 Tbs butter until caramelized.
  2. Line a large baking sheet with aluminum foil. Slice Hawaiian rolls in half and place on baking sheet.
  3. Spread a thin layer of pesto onto the bottom bread.
  4. Place your desired amount of turkey, cheese and caramelized onion onto each sandwich and close your slider with the top half of the roll. If you’d like, place a toothpick in the center of each sandwich to help hold them together.
  5. Preheat your oven to 350.
  6. In a small sauce pan, bring 1 stick butter, mustard, brown sugar, Worcestershire sauce and poppy seeds to a boil.  Quickly remove and pour sauce evenly over sliders.
  7. Bake for 15 to 20 minutes
  8. Enjoy!

These sandwiches are best served warm and are delicious as leftovers. If you try this recipe, I’d love to hear what you think about it! I know you’ll love them as much as my family does. Maybe it’ll even become a staple dish in your household!

Are you a fan of slider sandwiches? What are some of your favorite slider recipes?


Laura

Filed Under: Appetizers, Casseroles & Comfort Foods, Home Cookin' Tagged With: pesto, poppy seed, sadwich, Sliders, turkey

Super Simple Cornbread Casserole Recipe

October 31, 2015 by Laura Tucker Leave a Comment

There’s always that one dish at Thanksgiving dinner that you just CAN’T EVEN wait to stuff your face with. Some may say that’s true about almost everything on the table at Thanksgiving, and I’m over here raising my hand agreeing with you! But there’s usually that one that you KNOW you’ll be having seconds (or thirds,I won’t judge) of.

This casserole is that dish for me. When I think of comfort food, cornbread casserole is one of the first that comes to mind for me. It’s full of warm, creamy, and savory corn-tasticness that almost melts in your mouth. It’s SO simple to make, too! I usually always have the ingredients on hand, because I love to take this dish to church events and family gatherings. It’s always on my menu for Thanksgiving dinner, but it’s great any time of year. I’ve had several people ask me for this recipe, and I’m so happy to share it with y’all!

This is a MUST have on the dinner table during Thanksgiving! Simple Cornbread Casserole - made with Greek yogurt

Ingredients:

  • 1 Box Jiffy Corn Muffin Mix
  • 1 can corn, drained
  • 1 can cream style corn
  • 1/4 cup sugar (I use Stevia or Splenda)
  • 1 cup sour cream (I use Greek yogurt)
  • 1 egg, beaten
  • 1/4 cup butter, melted

Directions:

  1. Preheat oven to 350. Spray 9×13 casserole dish with non-stick spray
  2. Combine all ingredients and pour into dish
  3. Bake for 35-40 minutes, or until set
  4. Enjoy!

If you’re looking for something with a little spice, try adding a can of Mexican corn in place of the regular corn. You could even substitute Mexican cornbread in place of the Jiffy Mix!

Do you have a favorite dish during the holidays that you’re always SO excited to eat? I always love to hear others share what they MUST have during Thanksgiving or Christmas dinner!

Filed Under: Home Cookin' Tagged With: casserole, cornbread, recipe, thanksgiving

  • « Go to Previous Page
  • Go to page 1
  • Interim pages omitted …
  • Go to page 33
  • Go to page 34
  • Go to page 35

Primary Sidebar

Connect

  • Facebook
  • Instagram
  • Pinterest
  • Twitter

Lookin’ for something in particular?

Welcome

ProfileImage
"Hi there! I'm Laura, and I'm a child of God, a wife, and a mother of two. My roots are planted deep in rural Alabama. Monograms, crafting and Southern cuisine - yes, these are a few of my favorite things! Join me as I grow my family in the beautiful South where the tea is sweet, the accents are sweeter, & someone's heart is always being blessed." [Read more...]

Subscribe via E-Mail

Footer

  • Facebook
  • Instagram
  • Pinterest
  • Twitter
Disclosure:
My site may contain affiliate links, which means that if you buy the products featured, I receive a small percentage of the sale price at no extra expense to you. Thanks for visiting Southern Made Simple!
By using this website you agree to our:

Privacy Policies

Copyright © 2023 · Foodie Pro Theme by Shay Bocks · Built on the Genesis Framework · Powered by WordPress